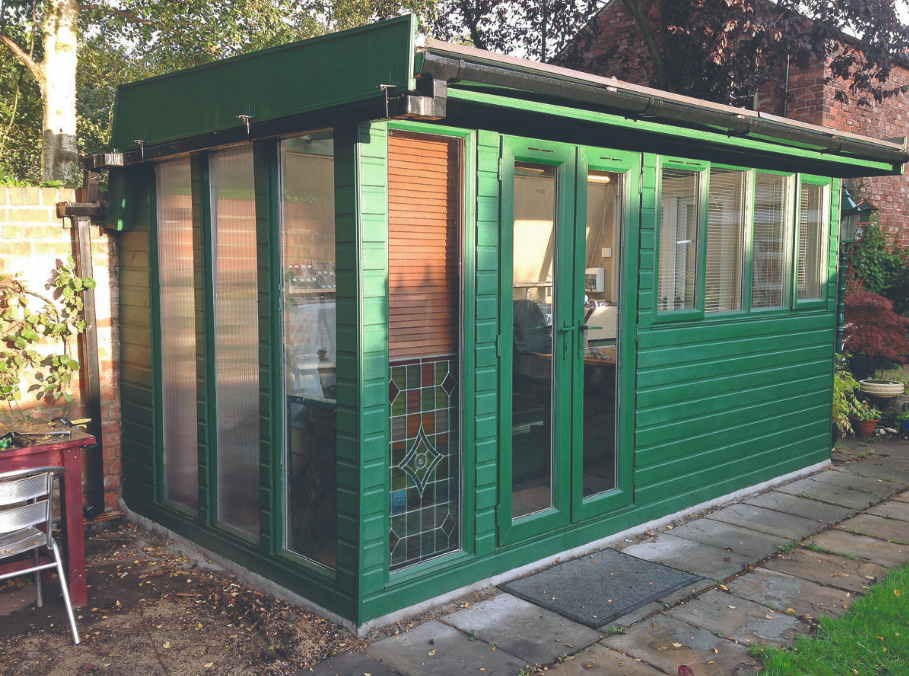
Own workshop is the dream of every person who loves to work with a tool. At the same time, it seems to many that its construction in a suburban area is a complicated and troublesome matter. However, everything is much easier if you use modular technology. That’s exactly what we did.
Designing
The size and format of the finished building are dictated by the height and width of the plastic doors. You can use the Visio program to create a project. It should include all existing window sizes, and then arrange them in the necessary planes (Fig. 1). When calculating, it should also be taken into account that the workshop should be located as close as possible to the brick wall of the fence. The roof is planned with a slight slope, while the main task of its design is to collect rainwater for the garden.

Preparation of the foundation
After clearing the territory, about 2 tons of topsoil were removed. And for leveling the site, 1 ton of crushed stone and sand were used. The selected land was perfectly useful for raising beds. The most difficult thing, of course, will be to remove shrubs, or rather their roots. But the ultimate goal is worth it!
After compacting the crushed stone, you should start pouring the concrete base. Also, sidewalk vibro-cast concrete slabs 500x500x50 mm were selected for the rough floor. When pouring the base of the building, you should think about the supply of communications and their outputs through the concrete slab to the future construction.
Construction
It was decided to build a modular workshop. This simplified the assembly and made it possible to stretch the construction indefinitely, gradually making each wall and removing it into a spacious shed located on the site. This solution made it possible to make sure that the calculations were correct and that the stand-alone modules were sufficiently rigid (the weight of PVC windows and the thickness of the insulation should be taken into account).
For the frame of the building, we chose boards made of softwood of rather low quality (there were plenty of them on the site). As a treatment, a number of impregnations were used, protecting not only from fungus and moisture, but also fire. A nail gun was used to connect the structure. PVC frames were attached to screws on wood.

After the base was made, it became a working area for the construction of the front frame. First, the longest parts were cut for the top and bottom of the structure. Then the door and window frames were cut out. The high windows were used as “French” and stood at the same height as the entrance door. The structure was also reinforced with longitudinal beams at the corners. This solution further simplified the fastening of the exterior cladding. After the assembly was completed, it was decided to add another vertical rack.
Based on the structure of the building, it is necessary that each double vertical axis has the same width, equal to the amount that remains when subtracting two parts of PVC windows and doors. Initially, they wanted to make a threshold and window sills at the workshop, but this idea had to be abandoned due to the heavy load on the construction.
The next stage included the treatment of all parts with impregnations and the assembly of the panel. Door and window frames were pulled with screws on wood from the side of PVC frames. At each nailing or screwing, the alignment of the structure was carefully checked. Thus, the work on the facade panel of the workshop was soon completed.
The result can be considered two very important rules for building:
- The door in the workshop should open outwards;
- At least two more people are needed to move the finished facade panel.
Sidewall assembly
During the construction of the workshop, or rather, the assembly of the side wall, there was a little trouble: the building turned out to be slightly higher than the brick fence installed next to it. We didn’t want to annoy the neighbors with the sight of the roof sticking out from behind the fence, so we considered ways to avoid this. In particular, to build a small rear section of the roof.

After the lumber, gutter elements and facade board were delivered, it became possible to use them to assess the angles needed for the rear part of the roof. The main vertical posts should be installed with a slope of about 15 °, which will allow the projection of the ridge to rest on the top of the wooden frames supporting the door frames.

Installation of the frame
A sheet of waterproofing material and film was attached directly to the brick wall. Guide rails are also installed. When installing the structure, a large number of supports and clamps should be used. This warning is especially relevant for the joints of the wooden frame with the frame of PVC windows. After the installation of the frame is completed, you can proceed with the installation of windows and doors.

Completion of construction
The end of the project was marked by the fastening of plastic panels on the facade of the workshop, laying the floor, laying insulation and installing equipment. The walls were sheathed with drywall. In the future, we planned to paint them.

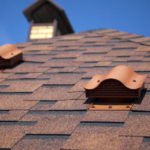
Drain
Initially, the goal was to collect rainwater for watering the garden. To do this, a sectional drain was installed on the roof of the workshop. This solution can be considered successful, taking into account the installation of a flat roof raised against the wall by 15 °. A plastic barrel with a capacity of 100 liters was mounted behind the workshop.
Related posts:
 Glass Greenhouse with Their Hands
 Insulated Flue – Saving Home from Fire
 Convenient and Useful Nozzle On the Trimmer With Your Own Hands
 Protect Your Garden, or How to Make a Scarecrow
 Outfit for Your Windows: Hinged and Roller Shutters, Mosquito Nets and Awnings
 In Your Garden Begins the Age of Stone: Choose Decorative Benches
 How to Build a Winter Garden in the Country
 How to Make a Washstand for Country House the Hands
 And Above us is Not Dripping: Shelter for the Garden
 Pros and Cons of Various Types of Solid Fuel for Boilers: Wood and its Derivatives
 Pros and Cons of Various Types of Solid Fuel for Boilers: Coal and Peat
 Choose Radiators for the Summer Cottage
 Additional roofing elements (accessories)
 Terraced motives the device is weatherproof wooden floors
 How to Heat the Boiler with Wood
 Always on Guard: Security Systems for Country Houses