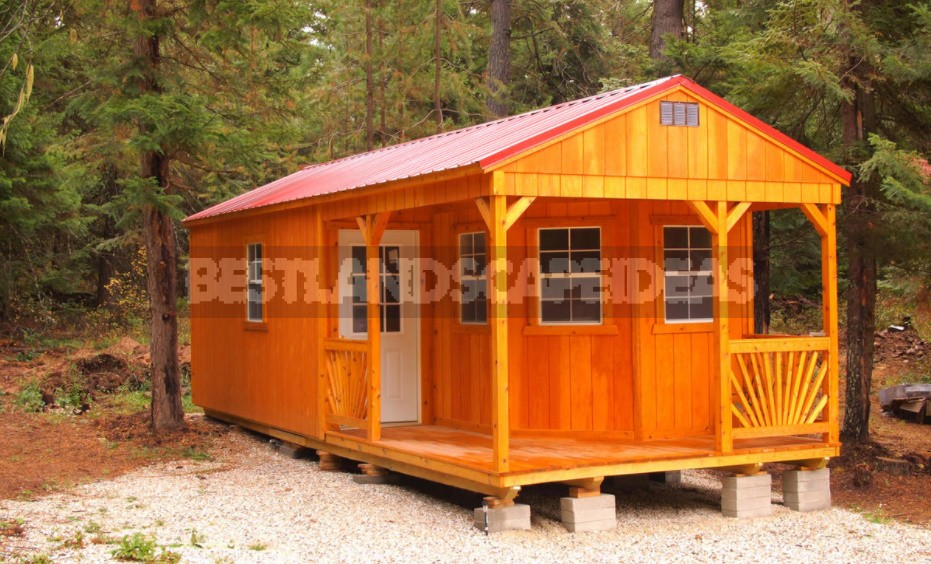
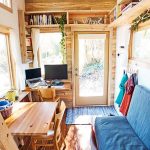
If it is not possible to immediately build a full-fledged house on the site, it is advisable to assemble a good inexpensive household unit, which will not only have a bathroom, but also a small living room. To build such a temporary shelter, you should not ask for help from professionals.
Required materials
So, we build a frame wooden building with dimensions of 6 × 2.5 × 2.6 m (Fig. 1). The thickness of the walls is 10 cm, the roof is single-pitched with a roof made of metal tiles, the foundation is columnar, the external cladding is an imitation timber board. Insulation of the residential part-slabs of stone wool. For construction, you will need:
- a beam with a cross section of 10 × 10 (15) cm;
- edged board 5 × 10 cm, 5 × 15 cm, 3.5 × 10 cm;
- floorboards 4 × 15 cm;
- board-imitation of timber for exterior decoration;
- roofing material and waterproofing films-membranes;
- perforated metal corners;
- various self-tapping screws, nails;
- OSB or plywood sheets 9-12 mm thick;
- insulation made of stone wool;
- sand, gravel and cement;
- asbestos cement pipe Ø10 cm;
- fittings Ø12 mm;
- doors 90 × 200 cm-1 piece, 80 × 200 cm-2 pieces;
- window 120 × 120 cm.

Fig. 1. The plan of the utility block. 1-warehouse for storing things and equipment (3.7 m²); 2-insulated room suitable for living (6.8 m²); 3-bathroom with shower and toilet (2.5 m²)
Foundation
As already mentioned, the support of the house will be built on pillars. Pre-prepare the place for construction-remove the layer of turf and level the site. Later, when we install the foundation pillars, we will make a backfill of sand and gravel, after laying a layer of film to protect against weeds. The recommended depth of the pipe pits is about 1.5 m.
Base frame
Between the foundation post and the binding bar, we will install a waterproofing gasket made of roofing material. The gasket is glued to the concrete surface on liquid bitumen mastic or molten bitumen. The main thing is that no “cups” are formed on the surface of the waterproofing, in which moisture could accumulate.
Before installation, we will treat the timber and logs with an antiseptic to protect them from rotting. During installation, we will drill holes in the beam with a diameter of 12 mm (equal to the diameter of the reinforcement), after which we will put the bar on the reinforcement protruding from the columnar foundation. Along the perimeter of the binding (base frame), we will put 5 × 15 cm boards on the edge. We will attach them to the frame using perforated steel corners and self-tapping screws. Similarly, we will connect them to each other.
Across the frame between the end boards, lay the floor logs from the same board with an interval of 50 cm, and attach them to the end boards with nails 4 × 100 mm. Before installing the frame walls, we will install floorboards on the logs and immediately fix them. As a result, we have a lower platform. On it, and we will mount the frame of the entire building.

1. The option of fixing the beam to the pile using metal corners fixed at the end of the beam with metal studs. 2. Planed floor boards of the household block are laid on logs and fixed with self-tapping screws or nails. 3. After filing, the floor boards are cut along the outer edge of the side bars
Erect and sheathe the frame
The frame of the utility block will be assembled from 5 × 10 cm boards. The height of the walls is 2.5–2.8 m (Fig. 2). The frame can be made locally. But in this case, to fix the bottom of the racks, you will need metal corners (two for each), and the racks themselves will have to be additionally fixed with braces and crossbars. The distance between the racks will make a width of 58-59 cm, so that between them you can install insulation mats with a width of 60 cm.

4. In the corners of the building, you can install racks made of 10 × 10 cm timber. They are fixed by temporary braces. 5. The joints of the OSB sheets of the cladding should fall on the rack. 6. For temporary fixing of OSB use clamps
The frame is finished with chipboard (OSB), attaching them with screws to the racks. This design will provide the necessary rigidity and will allow you to abandon the installation of struts. The OSB will be positioned horizontally, with a larger number of racks intersecting. Between the sheets, we leave a gap of 3 mm for expansion-compression.

Fig. 2. It is better to assemble the wall frames directly on the platform and lift them already assembled. Fig. 3. Design of the opening in the frame wall. At the top of the doorway, a crossbar is installed, resting on two pillars. Fig. 4. The crossbar at the top is reinforced with boards placed on the edge, and a jumper rack is added
Making out openings
We will put three doorways and a window, as well as install two partitions. The dimensions between the doorway posts should be 3-5 cm larger than the width of the door frame (Figure 3.4). We will also design the window openings in the same way. The lower window crossbar is fixed at a distance of 90 cm from the floor level. To determine the level of the upper crossbar, add the height of the window plus 3-5 cm.
We will fix the crossbars with perforated corners or long self-tapping screws, which we will twist into their ends through the racks. In the racks, before screwing in the screws, we will drill holes.We will assemble the upper binding at a height of 250-280 cm from a board measuring 5 × 10 cm. We will connect the binding elements together in a half-tree and also fasten them with steel corners.
Building a roof
The roof with a single slope will be built for the simple reason that it is cheaper and easier to double-pitch.
The assembly of the rafters will be performed on the ground, and then in the finished form we will install it on the utility block. The angle of inclination of the lean-to roof should be approximately 10-15°. We will mount the rafters with the same pitch as the posts in the walls. As a crate, we use boards with a cross section of 35 × 100 mm.
The truss frames will be supported on the upper binding and secured with the same perforated corners, and the overhangs and eaves will be covered with an edged planed board.

7. The ends of the rafters are filed vertically to attach wind boards to them. 8. The ends of the crate should protrude relative to the extreme rafters by at least 20-30 cm. 9. To the ends of the bars of the crate, attach the side wind boards
It is important to properly assemble the crate — solid or at intervals, depending on the roofing material. If it is a soft tile, we use OSB as the base of the roof, on which we will lay the coating. In the case of using metal shingles, we will make a plank crate. We will fix the roofing material with self-tapping screws with a rubber gasket so that the self-tapping screws fall into the boards.

10. Having fixed with clamps, the wind board is fastened with screws, and then cut off in place. 11. To fix the rafters in them, make corner saws. 12. As a roof, you can use metal tiles or slate
Exterior finish
The walls of the utility block will be finished with a coniferous board, and then painted. We will also design the overhang of the roof. For such a design, these finishing options are the most suitable. Using other materials will be more expensive.
Related posts:
 A Playground With His Own Hands
 The Basics of the Design of the Suburban Area
 Top 10 Ideas Decoration Garden of Gabion
 Decoration For a Flower Garden With Your Own Hands: Tea Set
 4 Best Ways to Add Square Meters to a Summer House
 Hammock with your own hands
 What Can Be Done For a Cottage From The Remains Of Cement And Concrete
 Design idea: Wooden country house on a wooded plot
 5 Best Gazebo for Country House. Types and Features
 Hobbiton – Features, How to Find, Photos, Design Ideas
 American Country House in the Style of Bohemian Shabby Chic
 8 Best Design Ideas to Improve Your Country House. Scottish Style
 How to build a Vertical Garden on a slope. Best Design Ideas
 Best Options for Gazebos. Types of Structures, Use in Landscape Design
 Home decor beached style
 The Clearing for the Forest Fairies