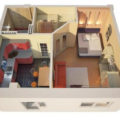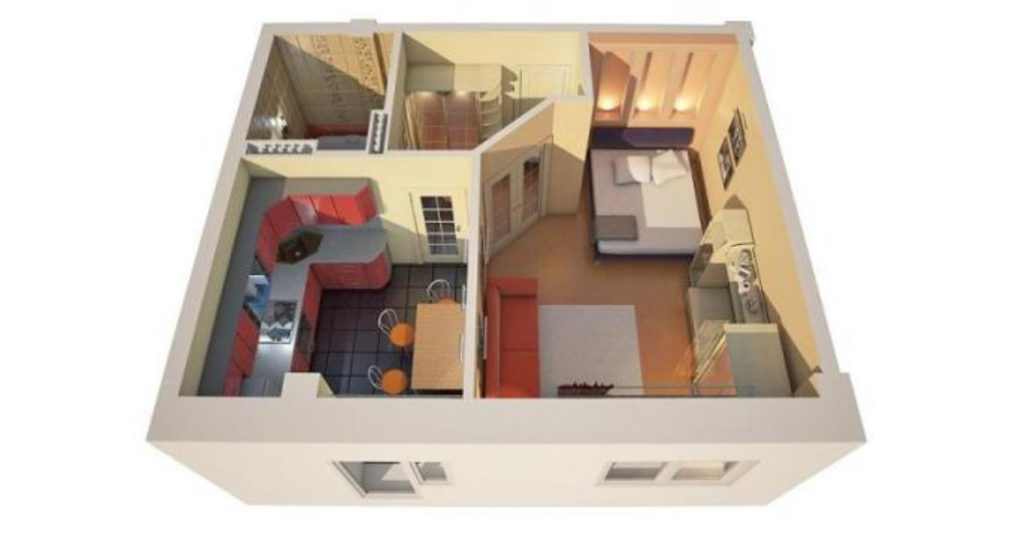
When the task arises to divide a large room into two parts, the simplest solution is to build a partition. You can make a frame out of wooden racks, as described here, or use racks made of thin-walled metal profile. Of course, the wall will have to be faced and plastered so that the innovation looks like a natural component of the house. However, before starting work, it may be necessary to obtain a permit from the local construction control authority.
Compliance with building regulations
Before starting work, it is necessary to find out from the local construction supervision authorities whether the new layout will comply with building regulations. For example, if the new room is residential (bedroom, living room, kitchen), it must, in particular, meet the standards for ventilation and lighting. They set the minimum area of windows, requirements for ventilation ducts, etc. If a bathroom or shower is planned in a new room, then the lighting requirements are softened, however, it may be necessary to install forced ventilation devices. The location of pipelines should also be taken into account.
")
If a bathroom or shower is planned in the new room, then it may be necessary to install forced ventilation devices
Do not forget that the size and shape of the rooms should correspond to the furniture intended for them. If it is planned to divide one large bedroom into two small ones, then it is necessary to provide enough space for the arrangement of beds and approaches to them, as well as space for a corridor so that the bedrooms are not adjacent.
Construction of the frame partition
Wooden curtain frame walls are usually made of softwood lumber with a cross section of 100×50 or 75×50 mm. The partition consists of an upper strapping bar (the upper element of the frame attached to the ceiling beams); the same length of the lower strapping bar, which is nailed to the floor; racks knocked down with nails with strapping and located at equal intervals between their midpoints of about 400 mm, as well as short extensions connected with nails with racks to give the structure sufficient rigidity. Stretch marks are needed if there are horizontal joints of the frame sheets in the partition.
")
Elements of a frame wall: 1. Upper binding; 2. Lower binding; 3. Wall rack; 4. Rack; 5. Spacer
Location of the partition
If it is planned that the new partition will be perpendicular to the floor logs and ceiling beams, then it can be installed anywhere. Each lag will carry its share of the load, and all of them will provide a rigid fixation. If the wall is parallel to the logs, then it should be located exactly on one of them.
")
On the left: the location is at right angles. The partition at right angles to the beams and logs is firmly fixed. Right: parallel location. The partition parallel to the logs should rest on one of them
Determine the location of a suitable lag and the need to strengthen it. If necessary, strengthen the lag by attaching an additional beam to it on each side. If the wall is to pass between the logs, then transverse support lintels must be installed between them.
Strengthening the lag
If you need to strengthen the log, it can be reinforced with additional logs (beams) attached to it from both sides.
")
Left: it may be necessary to strengthen the lag to receive additional load. Right: the jumpers between the logs will strengthen the structure
Using clamps
Remove the baseboards and lift the floor boards. Attach the beam clamps (brackets) to the walls with screws 50 mm long so as to install additional logs flush with the main one. Lay additional logs on them. Tighten the logs with bolts with a diameter of 12 mm with a square head. Drill holes for them with a slightly larger diameter, placing them at intervals of no more than 900 mm. Start from the center.
Using dowels
Instead of clamps, double-sided dowels (connectors) with a diameter of 75 mm can be used, installing them between adjacent surfaces of the lag.
If you have enough space and have a long drill, drill all three logs clamped with clamps at once. If this is not possible, first press one in place and drill two logs. Then remove the additional lag and press the second one on the other side. Drill it using the holes in the “standard” log as guides. Tighten all three logs with bolts.
Construction of a frame partition
When constructing a frame partition, it is possible to provide a doorway or a glazed area for additional lighting through an existing window.
Marking and placement of racks
Mark the position of the partition with chalk on the floor using the lower element of the binding — a bar with a cross section of 100 × 50 mm, using it as a ruler. Continue the lines on the floor up the walls on each side, using an alcohol level and a calibration ruler or plumb line. Make guide lines on the ceiling with a stretched chalk cord (see photo 1). This is a special exhaust cord that is automatically covered with chalk powder. Its use greatly facilitates the markup.
")
1. Snap the chalk line on the ceiling with a cord. 2. Mark the frame bindings at the same time
The location of the racks
Place the upper and lower strapping elements next to each other face up. Mark the position of each rack with an interval of 400-600 mm, starting from the middle, unless a doorway is provided. With a relatively thin covering of asbestos cement sheets or drywall with a thickness of 9.5 mm, make the interval closer to 400 mm, and for drywall with a thickness of 12.5 mm and tongue—and-groove lining boards – 600 mm. Draw the marking lines along the square at the same time across both boards (see photo 2).
Marking of the doorway
If a doorway is planned in the wall, provide for its presence when marking. The racks forming its sides should be spaced apart by the width of the door plus 6 mm of clearance and the thickness of both jambs. Mark the width of the opening on the upper binding, then mark the position of all the racks, starting from the sides of the opening, in both directions. Measure the dimensions of the two lower elements of the frame binding according to the marked upper beam and cut them to size.
Fixing the frame
Fix the lower binding on the floor with nails 100 mm long or 75 mm long screws with a countersunk head. To align the lower strapping bars in one line, use the upper strapping.
Having placed the upper beam along the corresponding marking line, press it to the ceiling with supports (see photo 3), then check along the plumb line that the marks of the racks on it are exactly above the same marks on the lower binding. Nail or screw the upper beam to the ceiling beams.
Measure the distances between the upper and lower bindings at each end and cut the side (wall) posts to size — they should fit tightly between the upper and lower bars. Attach them to the masonry with appropriate fasteners at least 100 mm long, and in the case of a frame wall, fix them with screws.
")
3. Press the upper binding to the ceiling. 4. Nail the racks to the harness
Installation of door posts
Cut the door posts to size between the upper binding and the floor. Install them by surprise, but do not fix them yet. Add the height of the door, the thickness of the upper bar of the door frame, 9 mm to the gap and mark this position of the upper bar of the door binding on the edge of one of the racks. Use the level to carefully transfer this size to another rack.
Installation of the upper door binding
Remove the racks, mark and cut a 12 mm deep groove under the 50 mm beam of the upper door binding. Put the racks in place and nail them at an angle to the upper beam and into the ends of the lower binding. Put the upper binding of the door in its place in the socket and nail it through the racks (see photo 4). Install a short rack between the upper bindings of the frame of the entire wall and the doorway.
Related posts:
 Glass Greenhouse with Their Hands
 Insulated Flue – Saving Home from Fire
 Convenient and Useful Nozzle On the Trimmer With Your Own Hands
 Protect Your Garden, or How to Make a Scarecrow
 Outfit for Your Windows: Hinged and Roller Shutters, Mosquito Nets and Awnings
 In Your Garden Begins the Age of Stone: Choose Decorative Benches
 How to Build a Winter Garden in the Country
 How to Make a Washstand for Country House the Hands
 And Above us is Not Dripping: Shelter for the Garden
 Pros and Cons of Various Types of Solid Fuel for Boilers: Wood and its Derivatives
 Pros and Cons of Various Types of Solid Fuel for Boilers: Coal and Peat
 Choose Radiators for the Summer Cottage
 Additional roofing elements (accessories)
 Terraced motives the device is weatherproof wooden floors
 How to Heat the Boiler with Wood
 Always on Guard: Security Systems for Country Houses