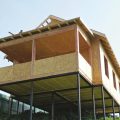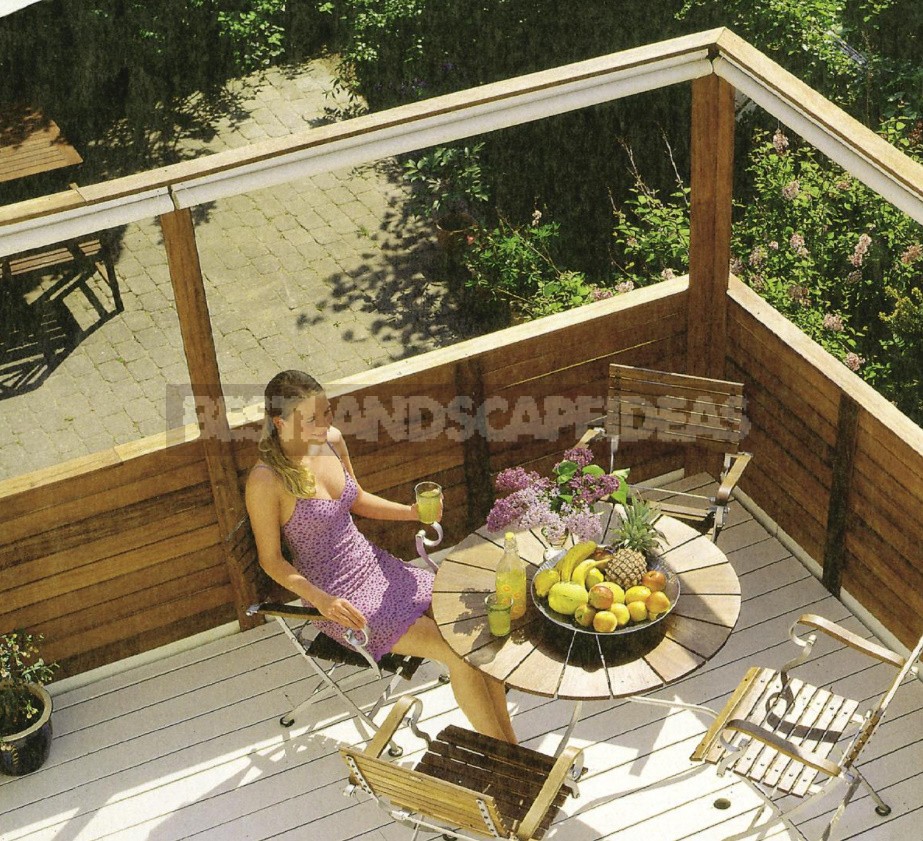
If you build a terrace at the level of the second floor, then you will have two rooms at once: from below a covered veranda that can be glazed, and from above-an open solarium. Such a terrace will not only increase the functionality of the house, but also harmoniously fit into its exterior. Its design is simple: to build such a building, it is enough to understand how the main elements are assembled.
Manufacturing of the frame
The base of the terrace is assembled from beams with a cross-section of 50×150 mm with the help of metal fixing corners with perforation. The external strapping beams are supported by posts attached to the foundation supports using anchor supports. Cross logs of the same cross-section are installed between the outer girder beams and the beams attached to the walls.
First, one of the beams is attached to the wall of the house, after placing it strictly horizontally. The end of this beam protruding to the width of the terrace is supported on a temporary stand and fixed with a clamp. Having secured all the wall beams, install and fix the beams of the outer binding on temporary supports.

Similarly, connect the beams at the corners and with the supports. The supports must first be placed in one line and strictly vertically. Cross beams-logs are cut to size according to the width of the terrace and laid in increments of 80 cm. They are attached to the wall beam with self-tapping screws, and to the outer binding beam with the same steel corners. Decking boards can be nailed to beams and logs with nails.

Corner temporary racks are replaced with stationary ones. Along the long side of the terrace, several concrete pillars are placed. Their number depends on the size of the structure and the characteristics of the soil at the construction site. Additionally, on both sides, the connection of the posts with the beams is reinforced with fasteners made of metal perforated plates (Fig. 1).
Concrete pillars are made by pouring mortar into plastic pipes (which are used, for example, for sewage) installed in drilled holes. The depth of the base heel of the foundation pillar is determined by the depth of freezing and the characteristics of the soil. Before pouring concrete from above, anchor plates are inserted into the pipe-formwork, to which the terrace posts will be attached.

Fig. 1. Terrace structure (dimensions in cm). The building consists of two parts: a load-bearing base with a horizontal board covering, mounted on a concrete columnar foundation, and a fence, the frames of which are held by protective curtains. 1 Cantilever beam 2 Frame rack 3 Plank flooring 4 Trim plate 5 Base trim board 6 Fence rack 7 Frame rack 8 Fence trim. 9 The upper binding of the fence
Frame sheathing
The side plank trim is mounted to the remote boards, which are attached to the posts so that the planks of the skin are in the same plane with the railing (photo 1-8).
When installing the fence, you need to take into account the fact that there are lumber of different sizes on sale. First, choose the appropriate gap between the boards, and then-their width, and calculate the required amount of lumber. In our case, the gap is 2 cm, and it can be considered optimal.
After the short fence posts with handrails are attached around the perimeter of the terrace, the upper binding is assembled along the corner fence posts. Before attaching the auxiliary structural elements to the supporting frame, they must be securely fixed with clamps.
Do not forget that the lumber for the manufacture of the structure, which will be located in the open air, must be treated with antiseptic compounds.

Photo 1. The position of the terrace cladding boards, taking into account the selected gap between them, is marked on the railing posts. Photo 2. The first rack is pre-drilled according to the marking and then used as a template for the rest. Photo 3. The racks are placed according to the marking and level, and then screwed to the beams of the supporting structure. Photo 4. The boards of the upper binding of the terrace frame are attached to the upper ends of the fence posts, controlling their horizontal position. Photo 5. When building a fence around the perimeter of the terrace, a board is first attached to the walls of the house, and then the fence covering is attached to it. Photo 6. The skin is mounted in the following sequence: first, install the slats through one, and then — between the previously installed ones. Photo 7. To connect the railings in the corners of the board is filed on the mustache. On the inside, they are attached in one plane to the upper horizontal board of the cladding, and in the corners – to the fence posts. Photo 8. The covering of the “plinth” of the terrace begins with the top board, which is attached to the posts outside. Subsequent boards are connected to the frame with screws from the inside.
Protective curtain screens
To protect the terrace from the wind, sun and prying eyes from a special awning cloth, it is necessary to sew curtains with a width of no more than 2 m, which can be easily unfolded manually. They are mounted to the posts on the inside in the upper part of the fence, attaching with a gap of 3 cm. In the corners of the terrace, this distance should be slightly greater, so that the rolled-up curtains do not touch each other.
The panels from the bottom and top are fixed between the profiled rails. The upper slats have three holes with a diameter of 10 mm for mounting to the upper frame, and the lower ones also have three holes, but with a diameter of 5 mm for rubber hinges. The lowered curtains will not flutter in the wind if the hinges are hooked on the hooks installed on the fence posts (Fig. 2).
In addition, the upper fixing rails are provided with two more holes ø 4 mm for rubber hinges 6 cm long, which are necessary to hold the curtains in a folded form. The advantage of elastic loops is that the roll can be quickly and easily fixed in them.

Fig. 2. The device of wind and sun curtains (dimensions in cm).
The fabric is hand-wound on round strips at the lower end of the curtain in a roll. 1-Curtain cloth 2-Semi-circular slats of the lower edge 3-Flat slats of the lower edge
For mounting rails, use furniture connecting elements or threaded studs with washers and cap nuts. For them, holes of the required diameter are drilled in the upper fixing rail.
To make curtains, you will need the following materials:
- synthetic fabric 1x2000x1030 mm;
- two semi-circular slats made of pine wood 28x14x2000 mm;
- two pine slats 35x10x2000 mm;
- three M6x60 studs with washers and hex nuts;
- three threaded bushings M6; 1 m of rubber cord ø 3 mm (for loops at the top and bottom);
- three threaded hooks;
- screws for chipboard;
- moisture-resistant joiner’s glue.
Related posts:
 5 Best Gazebo for Country House. Types and Features
 Hobbiton – Features, How to Find, Photos, Design Ideas
 8 Best Design Ideas to Improve Your Country House. Scottish Style
 Home decor beached style
 Grills and a Barbecue for Villas with Their Hands
 How to Make a Well in a Country House or Cottage?
 Types of Barbecues and Mangals
 Grill and BBQ: Where to Put How to Cook?
 How to Create Your Own Theater of Light and Shadows
 Insulated Flue – Saving Home from Fire
 Choice of Wood for Building a Wooden House
 Drainage Systems In the Suburban Area
 How to Choose a Place for the Construction of the Bath
 Tiles for the Garden With Their Hands
 Outfit for Your Windows: Hinged and Roller Shutters, Mosquito Nets and Awnings
 Drainage Systems in the Suburban Area Surface Drainage