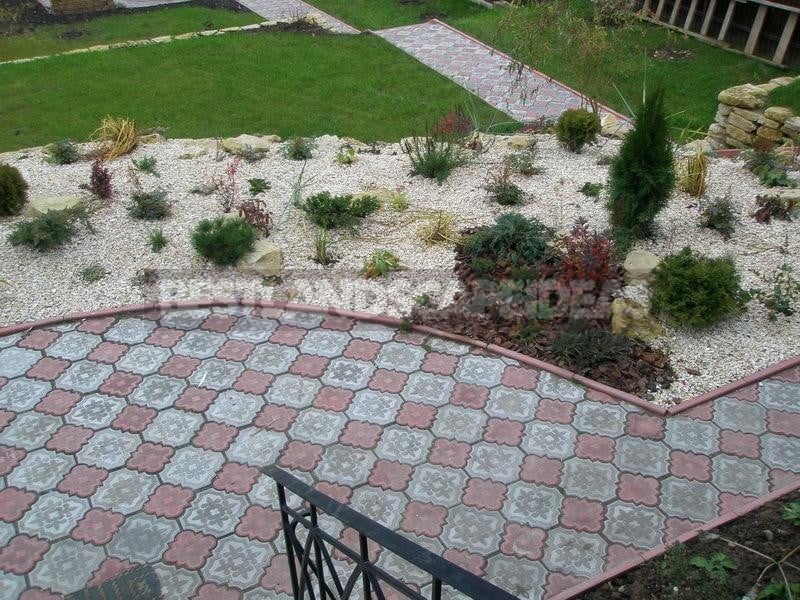
Paving slabs or paving stones are a beautiful, durable material that is used for the construction and decoration of garden paths, playgrounds and courtyards. Everything would be fine, but, unfortunately, the stone is not cheap, but to make your yard neat and beautiful like everyone else’s, that’s what I had such a great desire.
I could not buy paving stones in the required quantity – it was beyond my means, but I could easily make them myself. It is about how to make paving stones yourself that I will tell you in this article, fully illustrating the manufacturing process.
Necessary materials and devices
Actually, the technology of production of paving stones, as well as its recipe, was found by me on the Internet, the benefit of the information is more than enough, and I got down to business.
For the manufacture of such paving, it is necessary to have cement, sand, a superplasticizer and, optionally, a dye.
In the store I bought several bags of 500 grade cement and a superplasticizer: it will increase the strength of the paving stones and increase its resistance to low temperatures.
And I decided not to buy the dye. To be honest, as for me, the difference between colored and gray paving stones is small, the color still turns out with a shade of gray.
As a vibrating table, without which the manufacture of high-quality paving is simply impossible, it was decided to use an old Siemens washing machine, which has long served its time, but is still working. If someone does not know what a vibrating table is for, I explain – with its help, the maximum compaction of the forms of any concrete elements is achieved, in our case, paving stones, which becomes more uniform and, accordingly, durable.
The forms for self-production pavers
It turned out to be a difficult task to buy molds, first of all it was necessary to decide which molds I needed: rubber, capable of withstanding about 500 castings (manufacturing cycles), plastic, which will last about 250 cycles, or polyurethane, whose service life does not exceed 100 castings. Rubber and plastic turned out to be quite expensive, and taking into account the fact that I was not 100% sure of the successful outcome of the case, I bought ordinary polyurethane molds for the manufacture of paving stones in the amount of 10 pieces.

Technology of manufacture of paving stones with their hands
Now I will describe in detail to you the technology of production of paving slabs. For one casting, to fill 10 molds, I needed 10 kg(22 lb) of sand, 5 kg (11 lb) of cement and 30 g (1 oz) of superplasticizer.

I thoroughly mixed all the above components in the usual manual way in a large plastic bucket and only then began to add water in small portions, stirring the mixture until a homogeneous mass was obtained — so that the solution was viscous.
At this stage, the main thing is not to overdo it with water, its excess will reduce the strength of the finished product at times!
In addition to the components listed above, fine gravel or screening can be added to the mixture for pouring paving stones.

In addition to the fact that gravel will give the products even greater strength, its inclusions visually make the paving more natural — “stone”. The ratio of the solution in this case is as follows: 30 g (1 oz) of superplasticizer, 2 parts of sand, gravel and cement.
Before pouring our solution into the mold, it must be lubricated with a special emulsion. There are a lot of emulsions for these purposes on the market, but I listened to the advice of my old friend and treated the molds with ordinary dishwashing liquid – you can use any one. Apply the liquid with a small brush, carefully spreading it in a thin layer over the entire inner surface of each mold.
After all the forms are processed, they need to be slowly filled with a solution. I put the molds directly on the top cover of the washing machine and, filling them in half, turned the machine into spin mode.

In order to slightly increase the vibration, I previously put an old bedspread in the drum of the washing machine. As soon as the machine started vibrating along with the molds, I added the remaining solution to them, completely filling them. This improvised vibrating table copes with its task, and I was very pleased with the quality of the vibration.
Then I took the molds out of the washing machine and put them on the shelves in the garage, covered them with ordinary plastic wrap to prevent excessive evaporation of moisture. Only two days later I took the paving stones out of the molds, it is not recommended to do this before, because cracks quickly form on the molds during operation.
To remove the paving stones from the mold, I lowered it for a few seconds into water heated to +80 °C (176°F): this contributes to the expansion of the mold, and as a result, the paving stones are very easily removed.

The released forms were filled with a new portion of the solution.

The finished products were stored under plastic wrap for the first 10 days in the same garage, and then they were moved outside and kept for another month to gain strength.
To make paving stones with your own hands or not, everyone decides for himself, and I can only say that it is exciting, easy and profitable. I hope that my little master class on tile making will be useful to you, try it and show your results!
Related posts:
 Grills and a Barbecue for Villas with Their Hands
 Tiles for the Garden With Their Hands
 Garden Swing With Their Hands
 Gazebo in a Country House With his Hands
 Unusual Country Furniture With Their Hands: Use Fabric. Floor Pillows.
 Children’s Swing With Their Hands
 Update Old Furniture. Decoupage.
 Children’s House With Their Hands
 Fence in the Country With Their Hands
 Easy Pergola for Garden With Your Own Hands
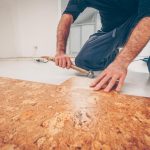 We Lay The Floor From a Cork Board
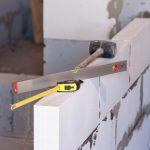 A Partition Made Of Foam Blocks With Your Own Hands: Photos And Step-By-Step Instructions
 LED Lighting In The Kitchen With Your Own Hands
 How To Lay Linoleum Correctly
 We Make a Headboard For The Bed From Scraps Of Boards
 Interior Partition On a Metal Frame