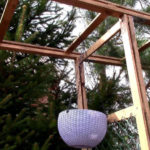
You can talk about the advantages of garden gazebos for a long time, but I think about them, in general, and so we all know: shade on a hot day, protection from rain in cloudy weather, the safety of the barbecue, swing and other garden “charms”. Only purchased structures do not always cope with the mission assigned to them.
We had two gazebos. Both of them, although we liked them at first, did not last long (one 3, the other 2 years). Some parts of the second gazebo are included in the described design, which we have high hopes for.
Tools and materials required
- welding machine
- drill
- metal pins (diameter 16 mm/0.6 in)
- 4 long square pipes (thickness 50×50 mm/2×2 in, length 3 m/9.8 ft)
- 4 long square pipes (thickness 50×50 mm/2×2 in, length 2.7 m/8.8 ft)
- 8 short square tubes (thickness 50×50 mm/2×2 in, length 0.4 m/1.3 ft)
- 4 long rectangular tubes (thickness 50×25 mm/2×1 in, length 2.2 m/7.2 ft)
- 4 short rectangular tubes (thickness 50×25 mm/2×1 in, length 1.6 m/5.2 ft)
- 1 square metal plate (25×25 cm/1×1 in)
- screws with washers 30 mm (1.2 in) in diameter
- 4 polycarbonate sheets (2×3 m/6.6×9.8 ft)
- transparent silicone
- 4 aluminum sills
- 1 metal cap to protect outdoor ventilation pipes
- paint
Preparing to create a gazebo
The gazebo is a serious structure, on the reliability of which the safety of your entire family depends. Therefore, the design issues should be approached very responsibly. The shape of the gazebo is most often determined by the convenience of its location on a concrete platform. For some, a hexagon is more suitable, for others, a square. We built a square gazebo, partly out of self-interest. Let me give you a sketch of our gazebo.
Basis
At first, we considered making the base almost cubic (length 3 m/9.8 ft, width 3 m/9.8 ft, height 2.7 m/8.8 ft) with the lower bars running straight across the floor. But, after thinking about it, we decided that everyone, especially children, would stumble over the lower threshold on such a gazebo.
But in order to create a sustainable design, it needs “legs”. Therefore, we came up with an installation option: 3 iron rods are hammered into the drilled holes in the concrete, “legs” are welded to them (two short square pipes welded at an angle of 90°), a long square pipe with a length of 2.7 m (8.8 ft) is welded on top. And so it is in every corner. Then the ends of the long pipes are connected by a long square pipe with a length of 3 m (9.8 ft). The same cubic base is obtained, only without pipes running on the ground.

Roof
The roof design is quite simple: 4 triangles connected to each other. At the preparation stage, 4 triangles of the specified size should be cut out of the polycarbonate sheets (base 3 m/9.8 ft, sides 2.2 m/7.2 ft, height 1.6 m/5.2 ft).
Recommendations
All pipes should be painted before welding on the ground, because then some of them will have to be painted at a height, which is much more difficult. And after installing the equipment, only paint the welds.
Install a gazebo
Welding works
In accordance with the “project” outlined above, the basis is being prepared. Here I will say again that reliability is above all else. Therefore, if you are not confident in your abilities, hire a professional.
Then we weld the openwork insert to the “legs”. Accordingly, their upper part was welded to the upper plank of the base.

Long rectangular pipes are welded to the corners of the base. After completing each of them, they” lean ” on the auxiliary pipe. When all 4 are cooked, they need to be cooked together. The square metal plate is welded on the bottom for strength. The auxiliary pipe is being removed. Then, weld a short rectangular tube that will hold the polycarbonate sheet in the middle. Accordingly, one end of them is welded to the middle of the upper plank of the base, and the other-to the top of the gazebo.

Polycarbonate mounting
The cut-out triangles are installed on the roof as follows. The first triangle is attached with screws and washers to the base of the gazebo and a short rectangular tube. The second triangle is attached in the same way. All joints are treated with transparent silicone. At the junction of the two triangles (above the long rectangular tube), an aluminum nut is superimposed. Then the entire seam is screwed to the pipe with screws. Similarly, the third triangle is attached and the seam between the second and third triangles is processed. Then the fourth triangle of polycarbonate is fixed and the remaining 2 seams are processed.
Electricity
Since we like to sit in the gazebo in the evening, and it is not always desirable to light a fire exclusively for lighting, I also stretched an electric wire and hung up the lamp.
Plans
We built the gazebo relatively recently, so we did not have time to implement everything that we planned. In the near future, it is planned to sew mosquito nets (the central one is with a zipper, the rest are deaf), since we have a river nearby and insects often fly “on the light”. And hang the “mosquito” lamp by connecting it parallel to the main lamp.
Related posts:
 Grills and a Barbecue for Villas with Their Hands
 Tiles for the Garden With Their Hands
 Garden Swing With Their Hands
 Unusual Country Furniture With Their Hands: Use Fabric. Floor Pillows.
 Children’s Swing With Their Hands
 Update Old Furniture. Decoupage.
 Casting Paving Slabs With Their Hands
 Children’s House With Their Hands
 Fence in the Country With Their Hands
 Easy Pergola for Garden With Your Own Hands
 We Lay The Floor From a Cork Board
 A Partition Made Of Foam Blocks With Your Own Hands: Photos And Step-By-Step Instructions
 LED Lighting In The Kitchen With Your Own Hands
 How To Lay Linoleum Correctly
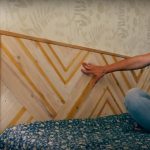 We Make a Headboard For The Bed From Scraps Of Boards
 Interior Partition On a Metal Frame