When building and repairing a house, it is not always advisable to purchase or rent bulky prefabricated scaffolding. Sometimes, especially with a limited budget, can help out hinged scaffolding, which is easy to make yourself.
Why are they needed?
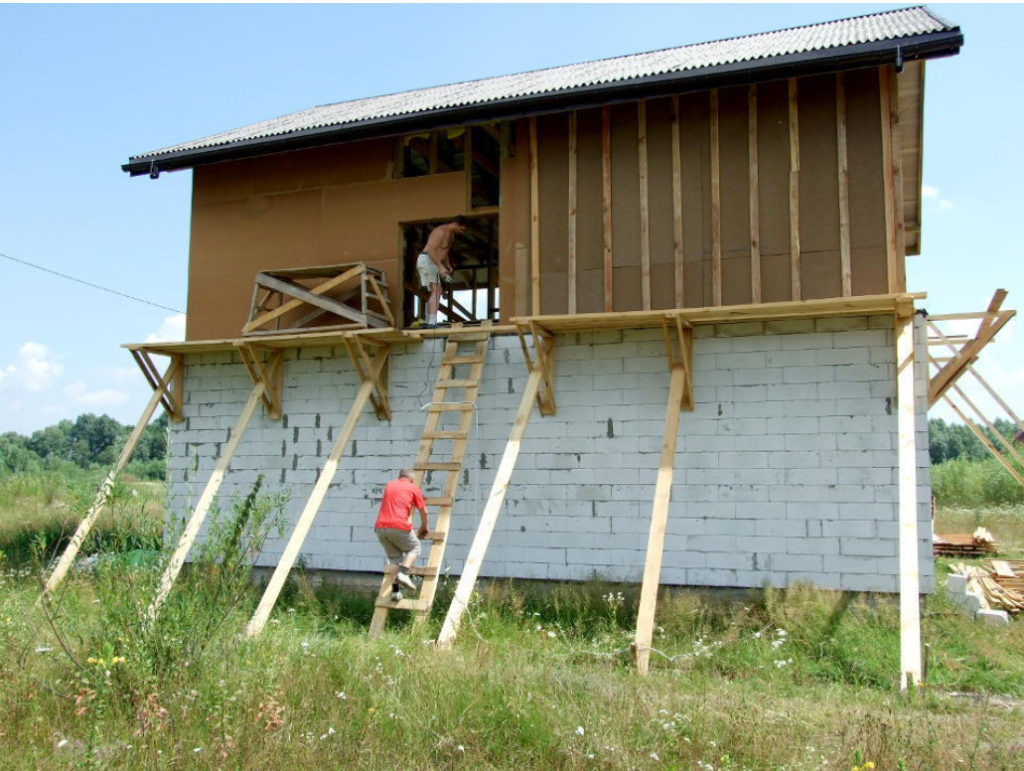
To paint a pediment or nail a board somewhere at a height, you have to puzzle over how to make it easier and safer. Putting up scaffolding for a little work is not profitable at all. One of the solutions to the problem is the scaffolding on the “envelopes”. With their help, you can easily and quickly do any job — paint or repair the window, install the platbands, trim the overhangs of the crate boards.
It is not difficult to make such scaffolds. It is also important that there is nothing to rigidly tie them to the structure, which means that installation and dismantling is a matter of a few minutes. When the work is finished, the elements of these devices will find a place in the barn or in the underground of the house.
Assembling the scaffolding
The main part of the structure is “envelopes” — support platforms of triangular shape. You can make them from edged lumber. First, the L-shaped brackets are knocked down from the scraps of the fifty-piece board, and then they are sheathed on the sides with thinner bevels, cut, for example, from boards with a section of 25 × 100 mm (Fig. 1a).
When choosing the sizes of “envelopes”, it is necessary to proceed from security considerations. So, on too small support platforms with excessively large consoles, the separation of “envelopes” from the wall with all the consequences that follow from this is not excluded. The optimal size of the horizontal shelf of the bracket is 350-400 mm, which allows you to stand on the flooring with a full foot.
To arrange the flooring at the desired height, you will need two more supports-beds of boards with a cross section of 50 × 150 mm. Before installing the support platforms, the upper ends of the legs are cut along the contour of the “envelope” corner, and the lower ones are sharpened to ensure a reliable stop of the boards in the ground (Fig. 1b).
When the “envelopes” are raised to the desired level, the vertical shoulder of the brackets is fixed to the wall with nails, without drowning their caps to the end — it will be easier to dismantle the structure later. The flooring boards are alternately lifted up and nailed to the horizontal shoulder of the “envelopes”. Here the nails need to be completely drowned, otherwise the structure will be shaky.
In order not to suffer when disassembling the scaffolding, it is advisable to drive nails through thin slats 8-10 mm thick — these gaskets can simply be split, freeing the nail caps for the nail cutter.

Fig. 1. The construction of the hinged scaffolding. a). The support platform is an “envelope”: 1- L-shaped bracket; 2- sloping. b). Installation of scaffolding: 1- support; 2- “envelope”; 3 — flooring boards; 4-support surface. c). Scaffolding on the racks: 1-racks; 2-flooring boards
Scaffolding on the racks
Another option of removable scaffolding (Fig. 1c) is just as simple and convenient when performing high-rise work at the wall of the building. For example, if you need to cover the roof of a house with slate. The matter will go much faster with the help of a structure that can be built from improvised materials — a thick board or even from a deadwood roundwood.
When installing the racks, their lower, slightly pointed parts are dug into the ground, and the upper ones are attached to the wall of the house with nails to avoid tipping over. Then, in the same way as in the first case, the flooring boards are lifted up alternately and nailed to the lintels of the supports.
Based on experience, we can say that it is possible to build a flooring up to 3 m long from a tongue-and—groove board-the shield will be quite rigid. When roofing on a roof with a slope width of 6 m, such a structure will have to be rearranged only once. It is more convenient and safer than jumping on ladders.
And don’t forget about the main thing: there are no handrails at the scaffolding, which means you can’t relax for a second. You need to prepare the devices very carefully, inspect and check each node, and start working only after making sure of the reliability and strength of the entire structure. With the help of scaffolding on the “envelopes” it is easy to perform any work at height.
Related posts:
 Glass Greenhouse with Their Hands
 Insulated Flue – Saving Home from Fire
 Convenient and Useful Nozzle On the Trimmer With Your Own Hands
 Protect Your Garden, or How to Make a Scarecrow
 Outfit for Your Windows: Hinged and Roller Shutters, Mosquito Nets and Awnings
 In Your Garden Begins the Age of Stone: Choose Decorative Benches
 How to Build a Winter Garden in the Country
 How to Make a Washstand for Country House the Hands
 And Above us is Not Dripping: Shelter for the Garden
 Pros and Cons of Various Types of Solid Fuel for Boilers: Wood and its Derivatives
 Pros and Cons of Various Types of Solid Fuel for Boilers: Coal and Peat
 Choose Radiators for the Summer Cottage
 Additional roofing elements (accessories)
 Terraced motives the device is weatherproof wooden floors
 How to Heat the Boiler with Wood
 Always on Guard: Security Systems for Country Houses