I started growing plants and flowers as a child. I grew everything in a row, because I just liked to watch a beautiful adult plant grow from a small shoot, sapling, cuttings or seedlings. But my real passion has become subtropical and tropical plants, which, as you know, do not fit on the windowsill. So I started dreaming about my own greenhouse. And so in the fall of 2016, I slowly began to realize my dream.
1. Site selection and preparation for construction
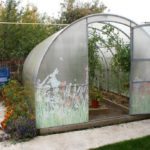
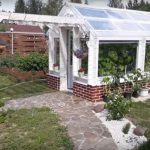
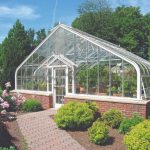
To begin with, it was necessary to determine the place of construction. Everyone knows that to build a greenhouse, you need to choose the brightest place where the sun shines most of the day. I found such a place in my garden.
Then it was necessary to determine the dimensions of the future greenhouse. I have it 4 m wide and 9 m long, including 1 m of the vestibule, and the height in the ridge is 2.1 m. After making a marking and driving pegs into the ground, I calmed down on this, since winter has come. But even in winter I did not rest, I was looking for companies specializing in the manufacture of greenhouses, and also engaged in the selection of material for the roof of the greenhouse (it had to be taken into account that it would be heated in winter). After studying the information on the Internet, I decided to use two layers of cellular polycarbonate (the thickness of the outer layer is 10 mm, the inner layer is 4 mm). Between the layers, you need to leave an air layer of 10 cm, which will give the effect of a thermos.

The whole process of making the greenhouse structure took a couple of months. It was delivered to me by a transport company. And I was looking forward to spring to start construction.
2. Foundation and wall construction
In the spring, the ground began to be cleaned on the plot marked out in the fall. Since I planned that the greenhouse would be deepened by 1.5 m (below the freezing point of the ground), there was a lot of work to be done. In addition, to fill the foundation, it was necessary to dig a trench with a depth of 0.5 m along the entire perimeter of the structure.
After the foundation, we started building the walls. Sand-concrete blocks with a size of 200×400 mm were chosen as a building material. The walls were laid in two bricks (that is, the wall thickness eventually turned out to be 400 mm, and the height of the masonry walls of the main part of the greenhouse was 1.9 m, that is, 9 rows).

Vestibule (1×4 m in size) we built a little differently. A trench 0.5 m deep was dug under the foundation (it was filled in at the same time as the main foundation). After laying the 6th row of the main part of the greenhouse, the builders released the blocks a little further, then put reinforcement on them and continued laying together with the vestibule, thereby linking the two parts of the greenhouse.
The construction turned out to be very large-scale. Broken bricks and stones were first thrown into the hole in the vestibule, everything was covered with sand from above, leveled, and only then filled with cement mortar along with fine rubble (a concrete floor turned out).
Next, we had to do waterproofing of the building. To do this, the walls were smeared with bitumen, and the roofing material was rolled out from above. Then they covered everything with sand. The filling was done up to the top brick. The final moment of this stage was the pouring of the upper layer of brick with cement mortar (in order to then mount the lower part of the greenhouse structure exactly). The result is an almost perfectly flat surface.
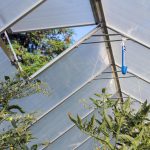
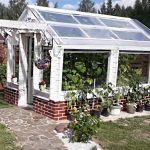
The most important stage of construction remained — the installation of the greenhouse. It was produced by the specialists of the company in which we ordered the design itself, in just five days. And now, when the greenhouse was already assembled, it remained to make a heating system, bring gas and electricity, as well as install lamps.
3. Installation of heating and lighting systems
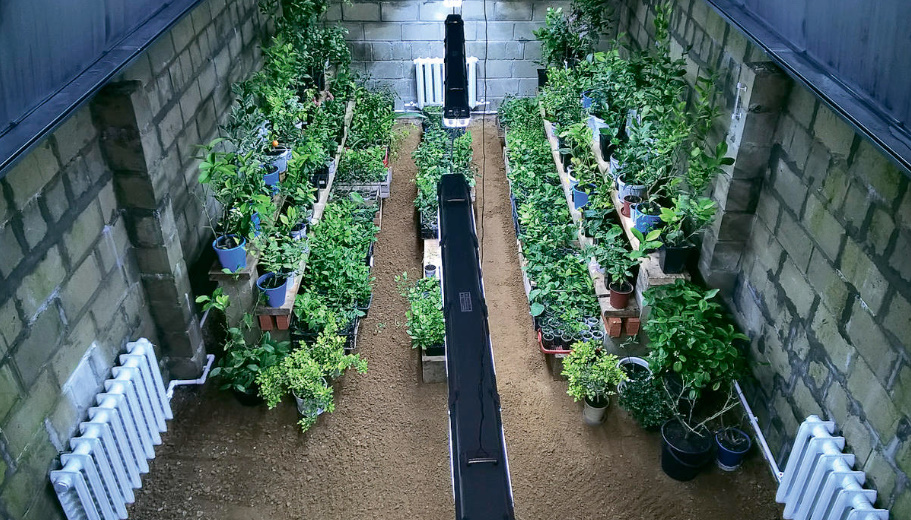
We chose cast-iron batteries as heating devices. As a result, 4 ten-section batteries were installed, one seven-section and one four-section. The result was 51 sections. Perhaps experts will say that this is a lot for 32 m2, but we were guided by the rule that more is better than less.
A pump for forced water circulation was installed in the heating system. A conventional single-circuit gas boiler with a chimney was installed. It was a small matter — to conduct electricity and install lamps, as well as connect a temperature sensor, which helps to flexibly regulate the temperature regime in the greenhouse and save up to 10-15% of fuel consumed. Lamps (4 pieces) were chosen as lighting with LED lamps (18 watts each).

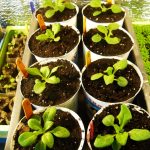
After the completion of all the installation and construction work, which lasted a little more than six months, the most pleasant moment came — the settlement of plants in the greenhouse. And now, seeing how fruits ripen on citrus trees, I am glad that everything worked out. And don’t be afraid of difficulties, go to your dream and make it come true. The main thing is to believe in yourself!
Related posts:
 Glass Greenhouse with Their Hands
 How to Arrange an Effective Drip Irrigation in the Greenhouse
 How to Choose a Variety of Cucumbers for Greenhouses
 Smart Greenhouses by Yuriy Zikov
 Polycarbonate Greenhouses With Their Hands
 The Foundation for Greenhouses: When You Really Need Him?
 Warming of the Greenhouse Base With Foam: Technology and Advantages
 How to Prepare a Greenhouse For Winter
 Automatic Ventilation Of Greenhouses. What Are The Options?
 Greenhouse for Spring Seedlings
 Early Start: Choosing a Material For a Greenhouse
 How To Build An Autonomous Winter Greenhouse
 How To Build An Autonomous Winter Greenhouse. Installation Of Ventilation And Heating
 Greenhouse Options: Ready-Made And Hand-Made
 How To Make a Greenhouse From Improvised Materials
 How To Choose The Perfect Greenhouse For a Summer Cottage