Laying concrete
Knead medium-strength concrete: 1 part cement to 2.5 parts sand and 4 parts aggregate. Do not add a lot of water — the solution should be relatively thick. Lay the concrete gradually, in strips approximately 600 mm wide, working towards the door. Seal and level it with a piece of a wooden bar with a cross section of 100 × 50 mm to the level of the chalk marking line.
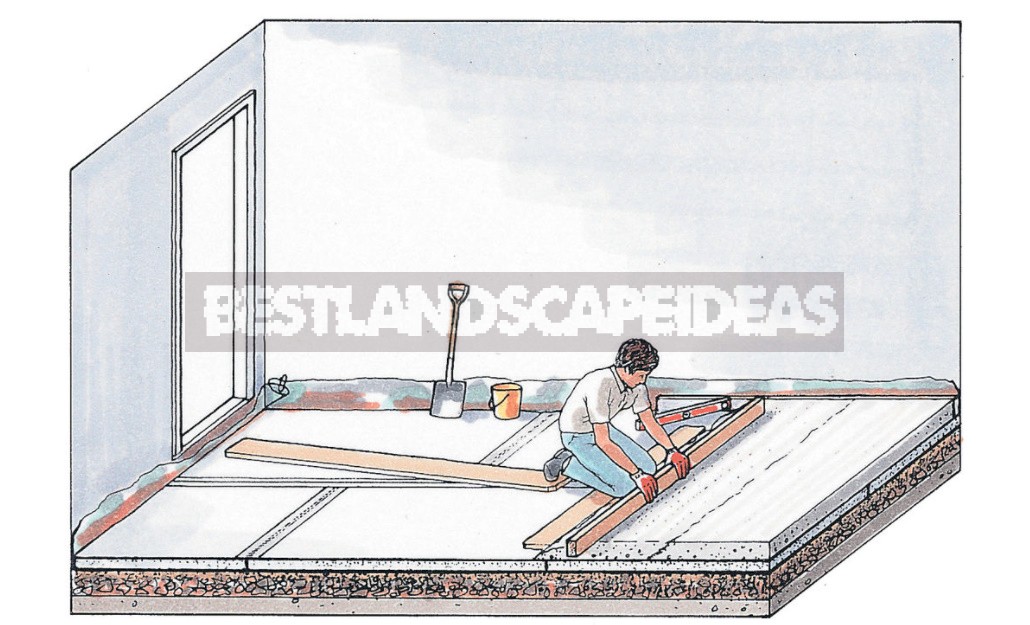
Laying concrete. Working in the direction of the door, lay the concrete in strips no more than 600 mm wide. Tamp it down to seal it, and bring its level to the chalk marking line. Place strips of thermal insulation material between the concrete and the walls
Small irregularities will be covered with a screed, but from time to time check the concrete surface with the help of a level and a rule (leveling rail).
After laying, let the concrete harden for at least 3 days, covering the floor with plastic wrap.
Laying the screed
Prepare a screed solution of 3 parts of sand with sharp-angled grains and 1 part of Portland cement. Moisten the floor and prime it with cement paste (liquid solution), mixed to the state of sour cream with water and an adhesive additive in equal quantities.
Working from one of the walls, apply a 600 mm wide strip of primer mortar with a stiff brush. At the ends of the primed surface, make screeds from the mortar along the stele and place lighthouses with a 40 × 40 mm cross section on them. Align them with the corresponding marking lines on the walls using an alcohol level and a rule.
Put the solution between the beacons and seal it well (see the picture below). Align the solution with the rule, guiding it along the beacons, then smooth it with a wooden grater. Carefully remove the beacons, fill the cracks with a solution and smooth them out again with a grater.
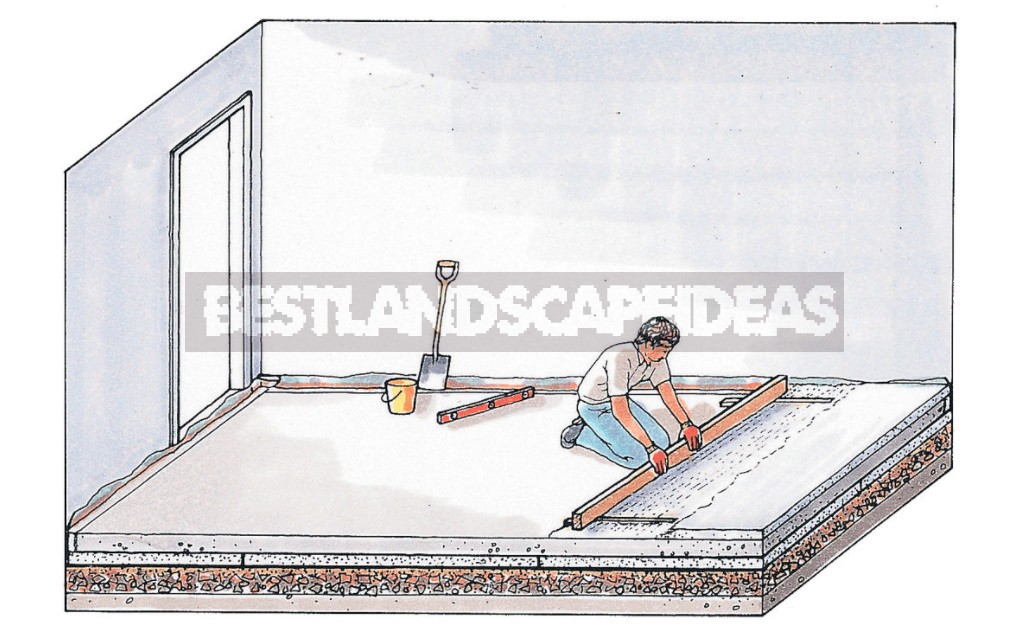
Laying of the screed. Apply a 600 mm wide strip of cement paste to the concrete base and fix aligned beacons on the mortar at each end. Lay the screed in strips no more than 600 mm wide and level the surface with a rule and a grater. Remove the beacons and fill in the gaps left by them. Then lay the next strip of screed
Laying of the screed. Apply a 600 mm wide strip of cement paste to the concrete base and fix aligned beacons on the mortar at each end. Lay the screed in strips no more than 600 mm wide and level the surface with a rule and a grater. Remove the beacons and fill in the gaps left by them. Then lay the next strip of screed
Repeat this cycle, making strips 600 mm wide and moving further along the floor area.
When the screed hardens, cover the floor with a sheet of polyethylene and wait a week. Cut the waterproofing gasket within 25 mm from the floor surface and put the baseboards (see the picture below).
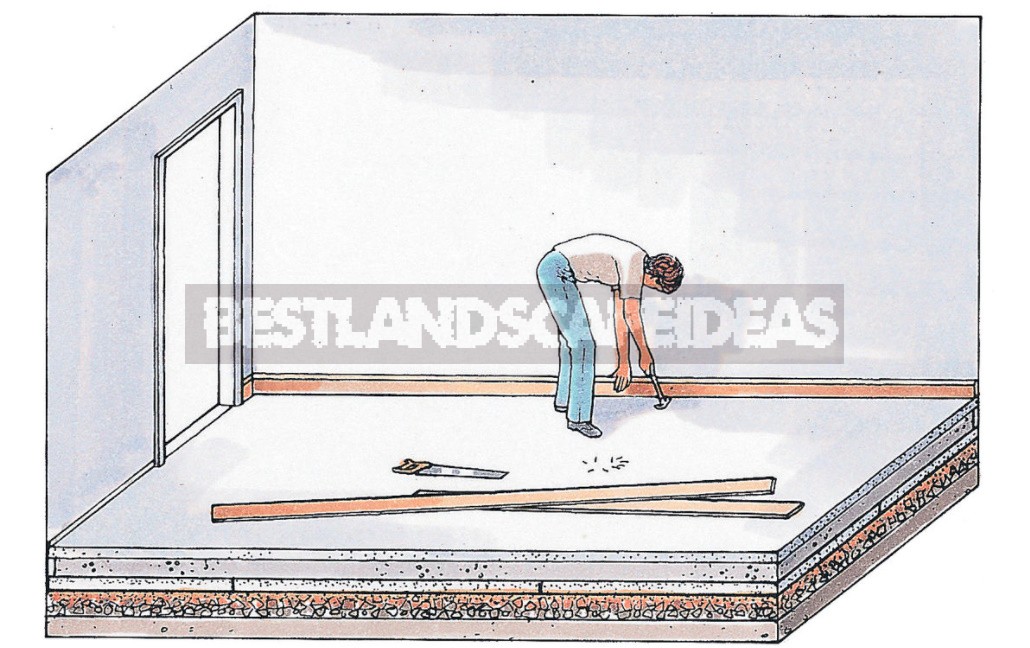
Edge finishing. Allow the floor to harden before using the room. Cut the edges of the waterproofing gasket at a distance of 25 mm from the floor surface and cover them with baseboards
The floor will dry completely not earlier than in 6 months. During this period, do not cover it with sealed finishing materials.
Floating floor made of chipboard
A common method of finishing a concrete floor is to lay a so-called floating floor made of chipboard. To comply with building regulations, it is necessary to put a thick layer of thermal insulation made of rigid polystyrene on the screed. A solid vapor barrier made of polyethylene is laid on top of it. Chipboard panels glued together with butt edges are placed on top. The floating floor is held in place by its own weight and baseboards nailed to the wall, which close the deformation gap.
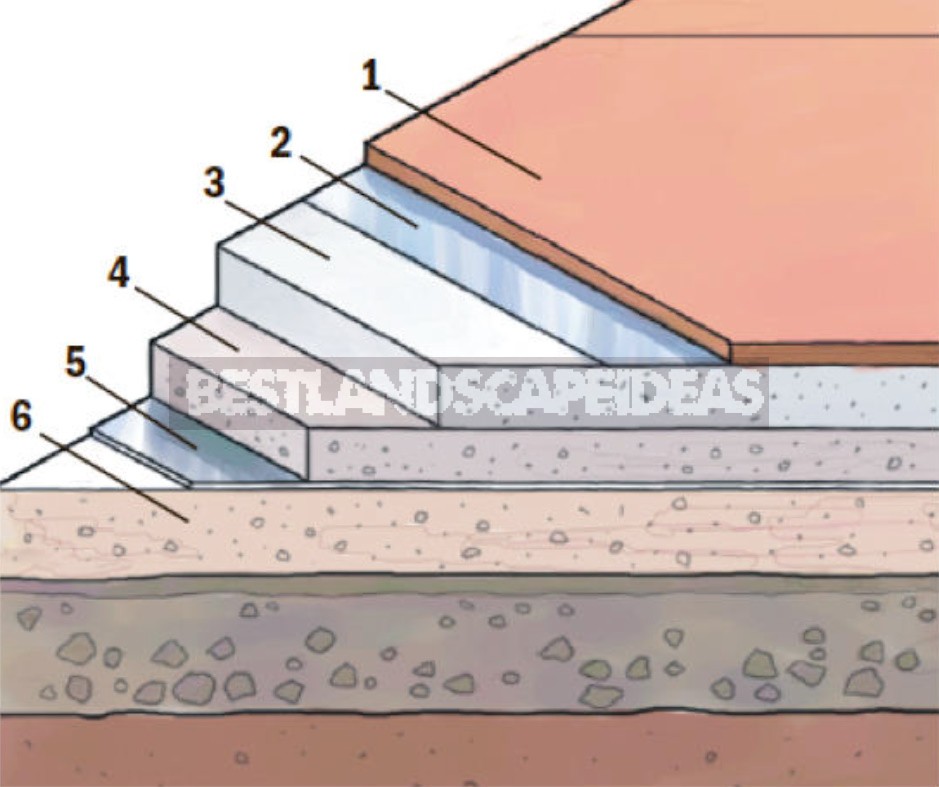
Floating chipboard floor: 1 – chipboard coating, 2 – vapor barrier, 3 – polystyrene thermal insulation, 4 – concrete screed, 5 – waterproofing gasket, 6 – concrete slab
Pipes
Sometimes home repairs involve laying pipes through the room. If the floor is monolithic, then this means placing pipes in the concrete floor. Although previously this method was widely used, modern plumbing requirements do not allow laying pipes directly into a monolithic concrete floor. However, it is allowed to place pipes in a plastic box in a channel laid in the floor.
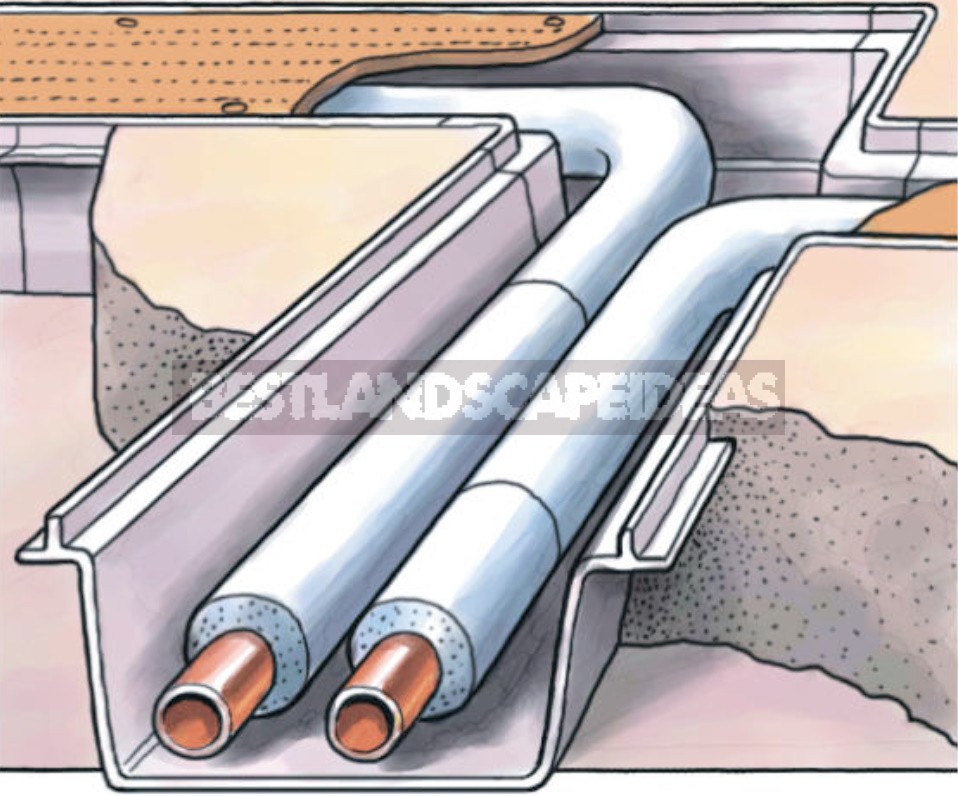
After laying and checking the pipes, a cover located flush with the floor surface is screwed to the flanges of the box. Ideally, the floor covering on top of the box should be removable.




Leave a Reply