There are a lot of articles about pruning garden trees, but not every article contains details explaining how to cut branches correctly. And this is the most important thing in garden surgery. But visual photos will help even a beginner to master the basic techniques and not harm the health of the plant. Here are 10 tips from the master that will help you cut and saw for good and without mistakes.
1. No saw blade — only pruner
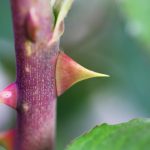
Pruning is an annual activity. Then it is enough to remove and cut the annual growth with a pruner. Well, at most two-year parts of branches. I illustrate this spoken wisdom. Here, the year-old leader was removed a year ago (Fig. 1, dotted line). During the first summer, the wound almost closed, and a year later it swam completely. The leader of the side shoot (arrow in figure 1) was cut just a year ago. Over the summer, he dutifully gave birth to a fruit twig and almost overgrown the wound.

The bark is intact, the tree reacts — this is cultural work. Even better, the tree reacts if you cut all this during the growth of these shoots — in the summer, until mid-July. And the wounds are overgrown until autumn, and the twigs come out as it should. This can be seen in figures 2 and 3.

2. Correct cut of the shoot
Here I have in mind the correct mechanical. See: a couple of millimeters above the Bud, at an angle of about 30 degrees (Fig. 4). This is the section that almost completely overgrows by autumn. To cut higher means to leave a stump. A dry junkie for another year or two (and if the escape is in the finger, then for three or four years)-a rotten hole with a guarantee. It is especially dangerous for stone fruits: Polypores will climb.

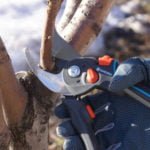
3. Pruning shears cut easily
Well, a clean cut is only a sharp pruner! Stupid, no matter how hard you try, leaves the bark up. I edit my own on a small skin after each pruning. But the main thing is how to cut. Thin twigs — no problem. But you can’t cut branches as thick as your finger at random. Especially those that depart at an acute angle. Take a pruner, go to the garden: we have practice.
Always direct the pruner blade outside, in the course of growth (Fig. 5). Here the wood is looser, softer. The blade is obtained from the bottom, and the support lip is obtained from the top, as in the photo. You can also cut from the side. But if you stick the blade in from the inside, push it against the growth — you’ll break it off rather than cut it off.

And now — the main thing: how to cut a thick shoot without effort. The pruner cuts like an axe, wedging itself into a tree. It is difficult to cut precisely because the blade is squeezed, pinched by a branch. That’s the whole secret — after plunging the blade, bend the branch along the course of the blade, i.e. to the support lip (Fig. 6). Freed the blade path — the branch itself bounces.
Any experienced gardener could do without pruning shears — even two-year-old branches with a garden knife. But still, cutting on time is a rare exclusive for us. Or an exclusive rarity? In General, we can’t do it without a saw. Well, let’s talk about the saw.

4. How to cut branches correctly
So that the cut is reliably overgrown with new bark. Let me remind you: the bark is incomparably more important for a tree than wood. Wrong sections of the bark kill, correct — save. The worst thing we do for our southern trees is to leave the stumps — so short that they no longer give birth to shoots. I thought it was laziness. But many carefully cover up every stump. You can understand the Association, but putty doesn’t help. Summer residents, apparently, take an example from industrial gardens. The trees there are all covered with snow! This is clear: the pruners have a plan, production per hectare. And the garden is planted for survival. Paid off, brought income — that’s fine. It stopped paying off, and it got stale.
But we, lovers, to bring the garden to this — do not respect ourselves and hate the trees. In the South, the damage from stumps is many times greater than from the wounds themselves. It happens like this: first, the stump is a dead plug in the trunk. But the winters are warm, the off — season is wet, and dead wood rots- what else can it do? No putty saves, and a rotten hole is formed. But most importantly, the bark dies on a dead stump. And dead bark is a resort for fungi and a hotbed of cortical cancer. The rot is spreading. At best, if the rot is stopped, there are terrible wounds around the stump (Fig. 7). In the worst, and more often in the South, cancer covers almost the entire trunk — write is gone.

Having increased the mass of the mycelium and finding a thin place, crack or wound, Polypores gets out to multiply in the form of fruit bodies — the familiar light “ears” and “hooves”. When you see them, realize that the tree is “not the first year for Polypores”. There is only one salvation here — strong growth, that is, regular unloading, rejuvenation of the lower branches, pruning to increase growth. A strong tree is ahead of the fungus, building up new rings of wood.
5. another harmful extreme is a dangerous cut
With this error, terrible wounds of unjustified size are obtained (Fig. 8). It was the owner who read the term “on the ring”, but did not understand what it means. I will make a reservation: for a young, strong tree, such a wound is not fatal, it is simply three times as large as possible and is unlikely to overgrow. But young trees and tired old people — slow death. Of course, there are forced huge and complex sections, there is also radical surgery to save. But just by deleting a branch, why double the harm to your breadwinners?

The cut to the ring is a whole topic. I’ll show you the most important thing, without any subtleties. The main thing is that the ring is not a circular saw wound at all! Here it is, a ring — a thickening at the base of the branch, marked by circular wrinkles of the bark. When the branch departs almost at a right angle, the ring is clearly visible. On it and cut (Fig. 9, dotted line).

So the wound is minimal and quickly swims the bark. Attach a ruler. If you cut like this, the cut diameter is double. So, the area of the wound is quadrupled! But most of the branches depart at an angle of 30-45 degrees. In this case, the exact cut to the ring is when the cuts are made on time! And the wound is minimal, and sticks out minimally. The wound will be the smallest if you saw perpendicular to the branch (Fig. 10, dotted line). But then the base of the cut is too protruding — then the bark may die. We need a compromise — divide the angle in half (solid line in the same drawing). This section almost does not stick out, and therefore completely overgrown with a roller.

6. Cross-section of a competitor branch
Remove a strong branch that goes up at an acute angle — this is no longer a matter of the ring. Here you can see with your eyes how the bark has grown together between the branches. Usually cut at the level of the fork (Fig. 11, the top line is a saw), and there is a huge stick. But do you see the “seam” between competitors? Here they are tightly compressed, but not completely fused. Splice begins at about half the seam. And I’m sawing down the bottom line. The compromise was successful, and the cut is not particularly sticking out. It remains to clean up the bark, and all of it will remain alive.

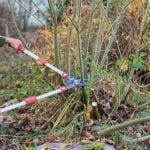
7. Cutting down a heavy thick branch
A thick and heavy branch can’t be removed just like that: before you finish it, it falls, tearing off the bark along with the wood. Therefore, first secure the lower side: file the bottom by a third (Fig. 12, arrow). Then cut from the top, retreating a palm or two from the trunk. The bough will fall away quietly and instantly, like a ripe pear. The remaining stump is quite easy to cut down.

8. Cutting the leader and transferring to a side branch
In the usual case, this section is a continuation of the upper side of the branch (Fig. 13, dotted line). In time, cleared of replacement shoots, such a cut normally overgrown with bark. You should only transfer the leader to well – rejected branches. Protruding almost vertically hold weakly and later with a high probability will break off, unable to withstand the wind or the weight of the crop. You do not need to transfer a strong leader to a branch that is several times weaker and has already switched to fruiting. This branch will not be strengthened. And the bark under the cut will definitely begin to collapse: a weak branch will not be able to feed the roller of new bark.

9. Cleaning the cut with a knife you
need to Clean large cuts just in order to stimulate the bark roller (Fig. 14). Cambium divides more actively when its cells are cut. A blunt saw does not cut them — it crumples, and then the cut becomes overgrown badly. A freshly cut garden saw with an oblique tooth — very even cuts, after it it is not necessary to clean the bark. Especially after a German or Japanese saw. But how often do you sharpen the saw?

10. Treat bark rot
The treatment of rotten bark is very important and very effective. In fact, this is resuscitation surgery. This is how cortical cancer is treated. Experience shows that bark rot, including cancer, most often begins around stumps and illiterate sections. But also where the bark was often stepped on with a hard boot, beaten, wounded, scratched by cats or gnawed by bark beetles. Rot is clearly visible, you just need to look more often: the bark is loose, in cracks, peeling, black. The medicine in all cases is the same: a sharp knife and impregnation.

May-June. Cut out the hearth with a knife to a healthy bark and live cambium (Fig. 15). Don’t be afraid to cut out too much: if you regret it, the cancer will devour you even more. In the center of the wound, a nest of rot is opened — a black ulcer that has affected the wood. It is enough to clean it: it will dry out and the rot will stop. But it’s safe to soak it with vitriol. Cover with nigrol, solidol or a special varnish paste. No more rot: a live and durable cow roller. Cancer eliminated! It remains to periodically impregnate the wound with the same nigrol, so as not to rot.
Related posts:
 Features of Pruning Shrubs (part 1)
 Features of Pruning Shrubs (part 2)
 Features of Pruning Shrubs (part 3)
 Features of Pruning Shrubs (part 4)
 Pruning Shrubs
 Seven Times Measure, or the ABCs of Pruning
 Pruning Trees and Shrubs: Choose a Winning Tactic
 Useful Tools for Cleaning the Site
 Rodenticides Will Help Get Rid of Rats and Mice
 Lunar Calendar
 Baking Soda for Garden and Vegetable Garden: 22 Ways of Application On a Site
 How to Protect the Garden From Crows
 How to Get Rid of Moles: From Absurd to Really Useful Ways (Part 1)
How to Get Rid of Moles: From Absurd to Really Useful Ways (Part 2)
How to Get Rid of Moles: From Absurd to Really Useful Ways (Part 1)
How to Get Rid of Moles: From Absurd to Really Useful Ways (Part 2)
 Plants That Need to Be Cut in the Fall
 Shelter Plants For the Winter: What And How To Shelter