
Wooden flooring for the floor can be made of boards, plywood or artificial wood materials – chipboard and fiberboard.
Wood boards
Floorboards are usually made of coniferous wood and are sold in a completely sharpened form with a tongue-and-groove edge. The narrower the boards, the less noticeable their shrinkage. For high-quality floors, more expensive, hard hardwood varieties, such as oak or maple, are used.
The best floor boards are radial sawing boards, they have minimal shrinkage. However, since this method is very uneconomical, in order to reduce their cost, floorboards are often sawed tangentially, that is, “tangentially”. But such boards are quite often warped and therefore should be laid with the concave side up, since the other side is prone to cracking.
The method of sawing (radial or tangential) can be determined by the location of the annual rings of wood at the ends of the board. In the photo below: on the left – radial sawing boards. Shrinkage does not deform such boards. On the right: tangential sawing boards. Shrinkage of such boards can cause them to warp.
")
The groove and the ridge of the tongue-and-groove connection of the boards are not located in the center of the edge, but are shifted closer to one of the surfaces. The boards are laid so that the ridge and groove are closer to the logs (beams). Although the tongue—and-groove boards are the same in size as with a smooth edge, the surface of the flooring formed by them will be smaller due to a reduction in the width of the board when cutting a tongue-and-groove (ridge) on it – by about 12 mm for each board.
In some old houses, on the lower surface of the floorboards, you can see traces of processing with an axe or adze. On this side, the boards were usually cut to the desired thickness only in those places where they lay on the logs.
The figure below shows different types of boards and other flooring materials:
")
Sheet flooring
Plywood or panels made of artificial wood materials are usually used as a base for other, more attractive coatings.
Plywood
Any waterproof plywood can be used for flooring. In commercially available varieties for the floor, the edges can be smooth or tongue-and-groove.
")
If the plywood is laid directly on the logs (beams), then its thickness should be 16-18 mm. If it is placed on the existing flooring, then a thickness of 6-12 mm is sufficient.
Chipboard
Chipboard is a panel of glued together small particles of wood. Only special grades can be used for flooring — they are pressed to a higher density than standard chipboard. It is possible to purchase chipboard with both a smooth edge and a tongue-and-groove one. Chipboard with a smooth edge has a thickness of 18 mm and dimensions of 2.4 × 1.22 m.
There are two types of tongue-and-groove chipboard: standard and moisture-resistant. Both types have dimensions of 2.4 × 0.6 m and a thickness of 22 mm. In rooms with high humidity, such as kitchens and bathrooms, you should always use moisture-resistant chipboard.
")
Panels with a thickness of 18 mm are suitable for laying on logs located at intervals of no more than 400 mm. If the interval between beams/logs is 600 mm, use panels with a thickness of 22 mm.
Medium density fiberboard
Medium density fiberboard — it is often called MDF (MDF: Medium Density Fibreboard) is a sheet material made of very tightly compressed wood fibers. MDF can be of standard, moisture-resistant and water-resistant types and is used for flooring where a smooth and smooth surface is required. MDF is sold in sheets of various thicknesses measuring 2.4 × 1.22 m with a smooth edge. It is more expensive than chipboard, but cheaper than plywood.
Dismantling of floorboards
Ideally, floorboards should have a wall-to-wall length. However, shorter boards are often also laid — in order to save material. When dismantling, start work with these short boards.
Boards with a smooth edge
Drive a stone chisel into the gap between the boards next to the cut end (1). Acting as a lever, lift the edge of the board, but try not to break the adjacent board. Insert the chisel into the slot on the other side of the board and repeat the procedure.
")
Lift the end of the board in this way, then use a carpenter’s hammer to widen the gap and insert a locksmith chisel (2) under the board.
")
Lift the next two nails and continue on until you have freed the entire board.
Security measures
Keep in mind that pipelines and cables in steel pipes may pass under floorboards. Check their presence with an electronic detector before sawing boards, especially when working with an electric saw.
Lifting a long board
Long boards are laid before the baseboard is nailed, so their ends are clamped under it. Therefore, in order to remove the board, it will have to be sawn through.
1. Find the position of the log by the presence of nails in the floorboard. Mark a line about 25 mm on one side of the nails and drill a test hole in the board with a diameter of 3 mm to make sure that you do not fall on the lag. Then make a technological hole for the electric jigsaw saw by drilling three or four holes in the board parallel to the log (photo 1).
")
2. With a chisel, cut down the wood between the holes and insert the electric jigsaw file. Cut the board to one of the edges (photo 2), then change the direction of sawing and cut to the second edge.
Lift the sawn end of the board with a stone chisel until you can insert a locksmith chisel under the board to dismantle it as described above. Then lift the second section of the board and dismantle it in the same order.
In the case of tongue-and-groove boards, the joints will have to be sawn first. When fixing the boards, it will again be necessary to make a support at one end from a bar of softwood.
Tongue-and- groove boards
In order to lift the tongue-and-groove board, first you need to cut the tongue-and-groove (comb) on both sides of it. Use a circular saw for this, if you have one, or a special saw for floorboards.
")
If you use a circular saw, set the sawing depth to about 12 mm and cut as close to the baseboard as possible (as far as the saw will allow).
")
Make the final cut with a hacksaw. Then cut the board across and dismantle it like a regular board with smooth edges.
Cropped board
Usually the ends of the boards are joined on the beam (see the picture below on the left). However, a board that has been cut level with the side of the beam, when laying in place, it is necessary to make a support from below. Cut the bar with a 50×50 mm cross section and fix it with screws on the side of the beam flush with its upper edge. Screw the end of the board with screws to this support bar.
")
Releasing the end of the board
To release the end of the board, clamped by the baseboard, lift the board almost vertically, and then pull it out of the gap between the baseboard and the log (see the picture on the left). The board that runs under the partition will have to be sawn next to the baseboard before it can be lifted (see the picture on the right). First, drill a technological hole for the tip of the hacksaw.
")
In another variant, you can use a special hand saw for sawing floorboards.
")
It has a curved cutting edge of the canvas, which allows you to saw the floor boards without lifting them.
Related posts:
 5 Best Gazebo for Country House. Types and Features
 Hobbiton – Features, How to Find, Photos, Design Ideas
 8 Best Design Ideas to Improve Your Country House. Scottish Style
 Home decor beached style
 Grills and a Barbecue for Villas with Their Hands
 How to Make a Well in a Country House or Cottage?
 Types of Barbecues and Mangals
 Grill and BBQ: Where to Put How to Cook?
 How to Create Your Own Theater of Light and Shadows
 Insulated Flue – Saving Home from Fire
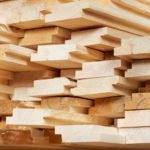 Choice of Wood for Building a Wooden House
 Drainage Systems In the Suburban Area
 How to Choose a Place for the Construction of the Bath
 Tiles for the Garden With Their Hands
 Outfit for Your Windows: Hinged and Roller Shutters, Mosquito Nets and Awnings
 Drainage Systems in the Suburban Area Surface Drainage