With proper operation, plank floors will last much longer than laminate or linoleum. In addition, boards made of natural wood are more eco-friendly. Using our instructions, any home craftsman can lay them.
How to choose a boardwalk
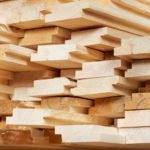
The most common type of floor boards – with a longitudinal groove and ridge and planed plate. Less common are boards with grooves and ridges on all four edges. The latter can be connected to each other in any order, while the former can not be joined together with the ends.
When buying, you should pay attention to the following:
- the difference between the front surfaces of the two docked boards should not exceed 0.7 mm, in many cases this indicator is maintained within 0.2 mm;
- the material should be free of diaper rash and loose knots, tight-fitting knots are acceptable, but there should not be many of them;
- the length of the boards in the package should be within the limits indicated on the packages; shorter blanks are often of lower quality, and it is more difficult to stack them.
Since the end joints of ordinary boards are undesirable, they are chosen to fit the length of the room. Working with such products, you can also save money by reducing the amount of waste. The choice of their thickness is most often due to the step of the location of the logs on which the floor is laid. The smaller this step, the thinner the board can be used. So, with a lag step of 70 cm, the thickness should be about 40 mm, with a step of 1 m-50 mm.
Method 1
Traditional board floors in ordinary urban apartments are not often found today. This is due, among other things, to the need to install logs that raise the floor level. Typically, the total height of the floor above the base, including the thickness of the boards, is approximately 60-80 mm. And this is a lot, especially in apartments with low ceilings. The situation is aggravated by the use of the old floor covering as a base for a new one.

Photo 1. Before laying the floor, check the position of the log. Their upper edges should be positioned horizontally and in the same plane. Photo 2. The boards are laid on logs and tightly knit together with each other with hammer blows through a wooden bar. Photo 3. The boards are fixed with 3.5 x 45 mm screws, screwing them at an angle of 45° into the lower wall of the groove or into the base of the ridge. The board should be well pressed against the logs. Photo 4. Screws are screwed in, drowning the heads. To prevent the board from splitting, pre-drill holes with a diameter of 3.5 mm for the screws. Photo 5. Cutouts under the ledges of the wall or around the door frames are marked in place or using a cardboard template. Photo 6. Cutouts are best done with an electric jigsaw or a regular hacksaw. The sharp edges of the saws are slightly rounded off with a sanding sandpaper. Photo 7. Under the pipes, holes are drilled, the diameter of which is 20 mm larger than the diameter of the pipe, and the bridge is cut through to the end of the board. After installing the board, the cut piece is inserted back in. Photo 8. The last board must be adjusted to fit the width. With a pencil, mark the cutting line on the board with the help of a board trim, which allows you to transfer all the irregularities of the wall to the board
Method 2
But there is also a more rational way of laying floorboards, the essence of which is the use of lining boards, in particular chipboard: logs are not required for this. The result is a reduction in the floor height to 40 mm.
The lining material must be strong, otherwise it will not withstand the daily load. Therefore, use plates with a thickness of at least 22 mm. Before installing them, the floor base must be leveled. For laying the final layer, a coating of solid wood with a thickness of 18-25 mm is used.
The technology of fixing in this way is the same as when fixing on the logs. The boards are laid on the flooring of the slabs, rallying with each other with hammer blows through an auxiliary wooden bar. For tighter bonding, you can also use wedges or special devices.

Photo 9. Narrow closing strips before installation are screwed with screws to the last whole board, while wide ones are laid like a regular board and fastened along the edge with screws.
Photo 10. The last boards are joined together with the help of a shock pad. The screws are screwed on top so that they can be closed with a skirting board. Photo 11. The necessary gap between the floor and the wall (approximately 10 mm) is provided by the installation of wedges. Photo 12. Pulling boards together with wedges is the most common and simple method used in the construction of plank floors. To do this, at a small distance from the board, attach a bar to the logs and hammer the wedges between this bar and the board. Photo 13. The position of the first or second row of boards is carefully set along the cord. Only after that, the boards are fixed with screws on the lining plates. Photo 14. When forming a gap between the wall and the flooring, the impact pad will help. When striking with a hammer, the pad is pressed tightly with your hand against the board, otherwise there may be traces of the tool on the edge of the board. Photo 15. Modern plastic wedges allow you to lay the boards against the wall with the desired gap. Photo 16. When laying the floor, the boards are fixed with screws to the plates, screwing them at an angle of 45°
To avoid the formation of unwanted cracks, swellings or cracks, each board is attached with screws to the lining plates, screwing them through the lower wall of the groove or the base of the ridge. The heads of the screws must be recessed so that the comb or groove of the next board can be freely inserted into the groove of the previous board.

For mounting, it is better to use self-tapping screws with a small countersunk head. Before finally fixing the next board, it must be tightly adjusted to the already installed one.
It should be borne in mind that the coating is fixed only on one side, so that it can freely swell or shrink without cracking when the humidity changes. In natural wood, the formation of cracks between the boards in winter is inevitable.
As in the case of a traditional plank floor, when laying floorboards on slabs, a gap of at least 10 mm wide must be left between the floor covering and the walls. To do this, wedges are inserted between the boards and the wall, which do not allow the already laid material to move when laying the next row. At the end of laying the coating, these gaps are covered with skirting boards.
Related posts:
 5 Best Gazebo for Country House. Types and Features
 Hobbiton – Features, How to Find, Photos, Design Ideas
 8 Best Design Ideas to Improve Your Country House. Scottish Style
 Home decor beached style
 Grills and a Barbecue for Villas with Their Hands
 How to Make a Well in a Country House or Cottage?
 Types of Barbecues and Mangals
 Grill and BBQ: Where to Put How to Cook?
 How to Create Your Own Theater of Light and Shadows
 Insulated Flue – Saving Home from Fire
 Choice of Wood for Building a Wooden House
 Drainage Systems In the Suburban Area
 How to Choose a Place for the Construction of the Bath
 Tiles for the Garden With Their Hands
 Outfit for Your Windows: Hinged and Roller Shutters, Mosquito Nets and Awnings
 Drainage Systems in the Suburban Area Surface Drainage