For an Orchid to bloom profusely, your desire alone is not enough — this plant requires special care. “What’s the problem?! The Internet is full of information about caring for orchids!” – you will say. And the problem lies in the fact that a novice in such an abundance of information is not difficult to get lost and make blunders that can cause not only the absence of cherished flowers, but also the death of the plant.
First of all, it is worth remembering that the name of the Orchid has a huge number of related, but completely different in nature, plants that require a different approach when growing. For each species (Phalaenopsis, Dendrobium, Wanda, miltonia, oncidium, Cymbidium, etc.), certain conditions are necessary, so you can not level all the orchids under one comb.

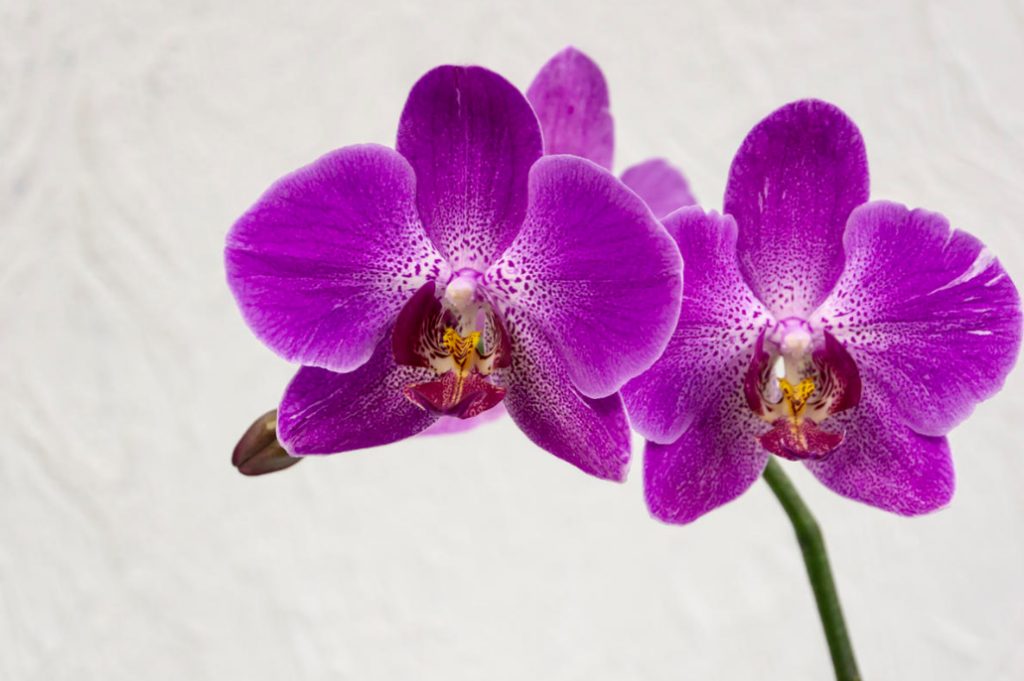
Since our stores most often sell an Orchid called Phalaenopsis, we suggest you pay attention to it. This flower is less capricious than other species, it is able to reveal all its talents even in the hands of a novice. And if this very novice does not start anything with the departure, then he will be guaranteed a beautiful flowering. What mistakes of the host negatively affect the development of the Orchid? We’ll figure it out together.
1. Landing in ordinary land
This error is the most frequent and annoying. Phalaenopsis can’t grow in the ground, remember that once and for all! These plants are epiphytes, in nature they look for a strong support (more often-a tree) and, having fixed their roots on it, live in this position for many years. Home Orchid pot and substrate are required primarily as a support: the roots of the plant are able to absorb moisture directly from the air.

Planting Phalaenopsis in ordinary land leads to rotting of the root system. Grow this flower in a special substrate, the main components of which are pieces of bark, peat and coconut substrate, mixed in certain proportions. You can also prepare the optimal mixture yourself, but this is usually done only by collectors and the most gambling orchidists. It is easier and more convenient for an ordinary florist to buy a ready-made substrate in a store.
2. Planting in a regular pot
The second most common error: planting in an opaque pot. Unfortunately, some growers overlook this point, considering the choice of containers for planting unimportant procedure. And oops as for good reason! In addition to the constant access of air, the roots of Phalaenopsis need sufficient illumination, because they are on a par with the leaves involved in the process of photosynthesis. It is this feature that obliges the epiphyte to be planted in a transparent pot, rather than in an ordinary one.

You can buy such containers in a flower shop or use a handy container. The ideal option is a transparent pot, the bottom and walls of which have small holes designed for more efficient air circulation in the area of the root system. But holes can be only in the bottom of the pot, this is not forbidden. If you allow the substrate to dry enough between watering, then additional holes in the walls will not be needed.
3. The first feeding
Blooming! That’s why we buy orchids. The beauty of most representatives of this culture is that they do not have a pronounced period of rest and are able to bloom twice, or even three times a year. In this case, each flowering period can stretch for months. Well, not a fairy tale! However, contemplate such exquisite beauty you will be able only in case, if you provide a Phalaenopsis sufficient amount of nutrients. And here there are several important nuances.

If you are a beginner, then you should not feed the blooming Phalaenopsis brought from the store (this is called store blooming). You don’t know what rations the plant was on before it got into your house. After a sudden feeding, it can easily become capricious and throw off the already tied buds. This happens quite often. Therefore, it is better to start forming the correct diet of your new pet after the store bloom.
The standard mode of fertilization for Phalaenopsis is 1 time in 2 weeks. Make-up is very convenient to combine with immersion irrigation, when the pot with the plant is put in a container filled with a solution of fertilizers. And now it’s time to tell you about the second nuance in feeding: the dose of fertilizer indicated on the package should be reduced by half. Phalaenopsis is better underfed than overfed. And then soon after the store flowering plant will please you with such a long-awaited and cherished home flowering. This will be your little victory and a reason for pride.
4. Traditional irrigation
In the fourth place of our list of errors in the care of Phalaenopsis — traditional watering plants under the root of the leech. This is how we used to water most green households, but this approach does not apply to this culture.

Since the substrate for Phalaenopsis consists mainly of pieces of tree bark, water coming from the watering can immediately flows down the pot. As a result, the upper part of the root system of the Orchid does not have time to get enough moisture, dries up and begins to die. If, in addition, the pot has poor drainage, then with this watering, the lower roots, on the contrary, will suffer from waterlogging, which will lead to their rotting. Some sophisticated way to kill the plant is obtained!

We recommend that you water your orchids by immersion. To do this, 1 time a week (or slightly less often, depending on the conditions of your home), place the pot with the plant in a larger container filled with standing water, but so that the moisture does not melt the neck of the flower. After 15-20 minutes, when the substrate is saturated, remove the pot from the container, let the excess water drain, and then return the green household to a permanent place.
An alternative humidification option, which is more suitable for rooms with dry air — is bathing the Phalaenopsis under a warm shower (the water should be at a comfortable temperature and not burn the skin at the bend of the elbow — check, as for babies). Despite all the fears encountered on the Internet, you can also bathe flowering plants in this way. Water can harm the flowers only in two cases — if you direct a stream at them under pressure, or expose the flower to the sun, when the petals are not yet dry drops. But now you know about it and you won’t do it.
After water treatments, leave the plant for a while in the bathroom: let the epiphyte enjoy the “tropical” conditions, and let the water drain out of the pot. Before transferring it to the window, remove the water accumulated in the leaf axils with a cotton pad or sponge: the growth point can rot from prolonged contact with moisture.
5. Placement on the South window
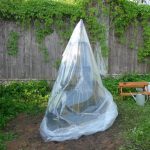
Phalaenopsis moved to our homes from warm countries, so the first thing that comes to mind for an inexperienced florist is to settle this southerner in the lightest and sunniest place of his home. This culture really needs sufficient illumination, and it is great if the lightest corner of your apartment will be the East, West or North window. But the residence of Phalaenopsis on the window sill of the southern window can lead to the opposite effect — sunburn, which will quickly destroy the plant. If all your Windows face South, keep your pet not on the windowsill, but on a table or stand by the window.

It can also save the curtain between the window and the plant, which in the summer heat will disperse the burning sun rays and protect the leaves of the plant from burns. And you can also paste a sunscreen on the glass, it will protect the Orchid from the burning sunlight.
6. Belated transplant
In most sources, you can find information that you can only transplant an Orchid after it has faded. It sounds logical and reasonable. But in fact, this advice only destroys the plant. And here’s the thing: producers who grow orchids for sale often place a piece of foam rubber or other absorbent material between the roots of the plant, which retains moisture after spraying (in industrial greenhouses, plants are sprayed, not watered). In greenhouse conditions, this method is effective, and in the home environment, when submerged watering or bathing from the shower can lead to waterlogging in the root area and rotting of the outlet.
Therefore, we recommend not leaving a new household to fend for themselves in the hope that they will solve their own problems. Do not be lazy to transplant Phalaenopsis immediately after purchase, do not forget to find and extract the ill-fated sponge from its roots. This will help to preserve not only the health, but also the life of the plant. However, you will have to act carefully, so as not to break the peduncle and not cause serious damage to the roots.

Growing orchids in indoor conditions only at first glance seems difficult – in fact, everything is much simpler. Compliance with the above rules and the absence of gross errors in care will allow this wonderful creature to feel at home in your home, which will guarantee its good health and long-term flowering.
Dear readers, do you grow orchids? What kind of views do you have at home? Share in the comments the secrets of growing these amazing green creatures.
Related posts:
 What To Plant In the Shade: Plants For Flower Beds
 Lilac: Selection Of Varieties, Planting And Care
 How To Plant And Care For Common Purslane
 How to Plant and Care for Bergenia. Types and Features
 How to Plant and Care for Cynara – Artichoke. Varieties
 Excursion to the Garden Centre Imperial Garden
 General Guidelines when Planting Flower Seedlings
 What Does Not Happen in Nature, or Chinese “Wonders”
 Prepare Tarragon for Pickling Cucumbers
 Cobaea is the Best Option to Decorate Your Garden
 Killer Dandelions
 Doronicum — Spring Sun in the Flower Beds
 Three Reasons to Plant Cichorium in the Country
 How to Grow Lobularia and Not To Confuse it With Alyssum
 Luxury of the North Garden
 Betonica Officinalis — What Kind of Plant?