In this article I will tell you how to create a fountain with your own hands. To implement the idea, you can, of course, go the easiest way – to hire specialists who will do everything for you, for a certain amount, of course. And you can show imagination and build a fountain yourself.

Materials
For the construction of this stone fountain we need:
- Water pump with power not less than 1100 W
- Copper tube 1.5 cm in diameter, through the base of which water will flow from the pump to the top of the fountain.
- Waterproof bowl (tank) to accommodate the pump. The bowl must be purchased such that the water pump is fully immersed in it, and the distance from the top of the pump to the edge of the bowl was not less than 15 cm.
- Plastic or metal pipe for mounting the electric cable from the pump.
- A coupling that connects the copper tube to the pump.
- The float regulator of the water supply.
- Metal mesh for the bowl, which will protect it from debris.
- Gravel for drainage, which you pour into a waterproof bowl.
- Tube made of polystyrene with a length of 3 cm for the withdrawal of the cord fastening of the pump to the outside.
Several bars to secure the grid on the bowl. - Flat stones, which make up the visible decorative base.
By the way, you can show imagination and replace the stones with a different material: clay pots or concrete bowls, for example. The main thing is to observe the technology. And then follow the detailed instructions, which step by step and shows in detail how to make a fountain with your own hands.
Dig a hole under the fountain
Deepening under the fountain do with a margin to waterproof water tank stood there freely, because after installation will need to strengthen it in the ground, covered with sand space between the sides of the tank and the ground. Sand should be carefully spilled with water, and sprinkle with stones on top, so that it does not subsequently fall into the water tank. The pit for the tank should be 5 cm deeper than the height of its sides. Immediately dig a groove from the fountain to the power source for the subsequent installation of the pump power cable.

Tank installation
Before you put the tank into the pit, fill its bottom with small pebbles to a height of 5 cm, then install the tank and strengthen it. Then measure the distance from your future fountain to the power source and take the same length of the pipe. Route the cable through the tube power supply cable from the pump, lay the pipe in the groove dug in advance, isolate it from both ends and cover them with soil.

Install the water pump in the tank
Immerse in the tank water pump, which will ensure the life of the fountain. It is worth noting here that the pump should be freely placed in the tank so that it can be easily removed for preventive maintenance.

Close the tank with a grid
To the tank, where the pump is installed, do not get debris and foreign objects, it must be closed with a metal galvanized mesh, on which make cuts for free access to the pump and the cord.

Install the timber
Now make a base for the fountain of durable boards section not less than 50 mm x 50 mm (we don’t want our handsome fountain fell into the tank?)) Bars put on top of a metal grid. They should be 8-10 cm longer than the tank pit at each edge. And before you lay the bars, it is necessary to attach to the pump a piece of metal tube (diameter 1.5 cm), on which water will be supplied to the top of the fountain. The pipe should be 8-10 cm above the expected level of the fountain.

Drill holes in the stones
In each stone, prepared for the garden fountain, drill holes in the center with a diameter of 5-6 mm larger than the diameter of the metal tube on which these stones we will plant. To work, you can use a puncher or a shock drill. When you will drill stones, periodically water them with water, and the drill will not overheat, and the stone will not crack from a strong shock load.

Mount the fountain
And now you need to install the stones on a metal pipe, collecting them as a pyramid and fixing each other with silicone glue. When the glue is completely dry, fill the tank with water (water should be above the pump level by 15-20 cm), then connect the pump to the mains and start it.
Adjust the water pressure as you need, then turn off the pump and decorate the base of the fountain. You can organize around it a small vadimchik, and can be done to the brickwork. Just do not forget to regularly add water to the tank, as it evaporates over time. A couple of times a month is enough.

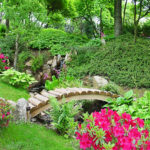
Here we are with you and made a simple fountain with his hands. By this technology, you can create and here are decorative fountains:


Care for your new construction is very simple: change the water filters in time, replenish the water in the tank twice a month, and in the winter all the removable parts of the fountain are better to be dismantled and removed until spring, the pit for the tank is covered with boards or a piece of plywood.
Related posts:
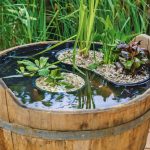 Mini Pond With His Hands From a Wooden Tub
 Gardening in Australia – Glenmore House and Garden
 6 Best Decorative Elements for a Patio in your Garden
 Best Spanish Decorative Ideas for your Country House
 Grills and a Barbecue for Villas with Their Hands
 Spring Inspiration
 Ideas for Landscaping
 Garden Figures With Their Hands
 Beautiful Lawn with Their Hands. Sowing the Lawn
 Rockery Against the Rules
 Create the Beauty of Landscape Design with Their Hands
 Independent Development of the Draft Site Plan
 The Highlight of the Villa Interior – Original Watches
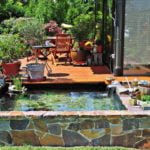 Water Reservoir at Home With their Own Hands
 Keychain, Made With Your Own Hands — a Great Gift
 New Year’s Topiary With Their Hands: Master Class