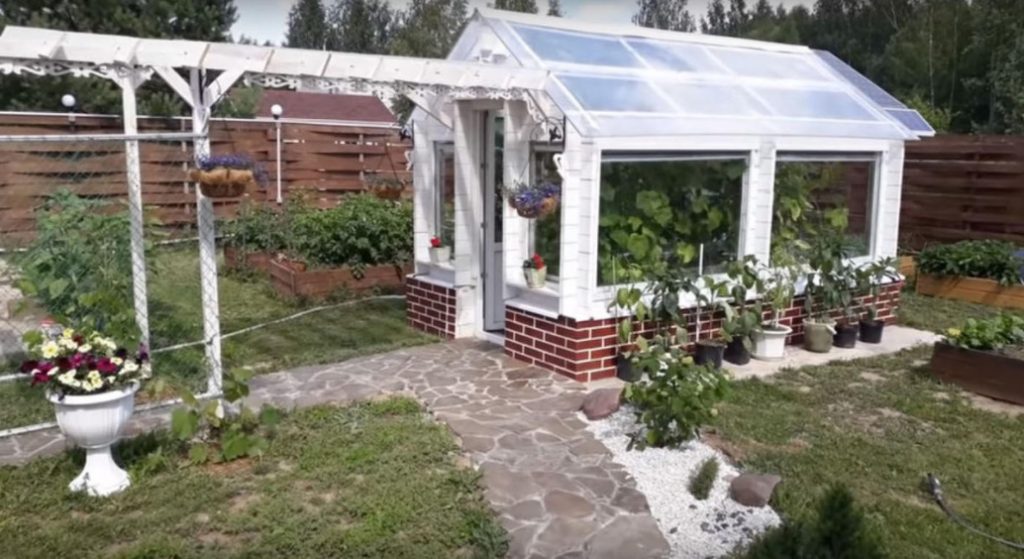
The usual greenhouse on the site is almost every summer resident. But to build a winter (with heating and ventilation), in which you can get a crop all year round, few people decide. The hero of our story, together with his wife, decided to put another greenhouse in addition to the usual one — all-season, with heating.
Filling of the foundation and arrangement of beds
I started with pouring the foundation into a fixed formwork. foam formwork is a good thermal insulation for the foundation. The formwork was buried in a trench one block down (250 mm). Then a layer of earth was removed to the block to make insulation. First it was necessary to put gravel, and on it-the system of heating the soil.

I took out the soil — and made a leveling backfill from the sand. after leveling with sand, i walked along the walls with a coating of waterproofing. i installed a water pipe and laid an electrical cable for the soil temperature sensor.

Then I laid styrofoam.

Then I started to manufacture the heat exchanger.The heat exchanger is made of ordinary sewer pipes with a diameter of 110 mm.

When installing pipes, I used silicone grease. When applying it to the joint, it is very convenient to connect the pipes.

On the styrofoam poured marble chips, which will work both as a drain and as a heat accumulator. On the marble crumb on the right and left put two heat exchangers. i covered them with marble chips and installed a temperature sensor.

The next stage of work has been completed. now on future beds exposed sheets of dsp. they also sheathed the inner walls, just in case, to fill the concrete path in the middle. On the beds, a layer of marble crumbs in 5 cm was added.

After filling the track, he sheathed the inner side of the dsp with clapboard. i put spacers so that the sides of the beds are not skewed. he put crushed leaves on the beds, and earth on it.

the clapboard boards are painted, a zero bar is installed on the foundation. The first stage is completed — you can install the frame of the greenhouse.

Production of a frame for a greenhouse
At this stage, I realized that I was not making a greenhouse, but rather a year-round winter garden. For the frame of the building, a mini-bar is prepared. I made drawings — and ordered parts for the frame at the factory. The frame was planned to be assembled in a couple of days.
The boards are filed and numbered according to the project. First, we set the zero semi-profile.

On it we lay the first crowns. catch the diagonals — and sit on the foundation.

We fasten the zero board with a screw to the Base.

After that, insert the gasket and settle the board with a mallet. The initial first level is ready. Now we collect the columns. we display the walls and form openings. a quarter is cut out under the windows.

The frame is installed, now you need to trim the roof.

The building is oriented sideways strictly to the south.

With a manual milling cutter, we select a 2×2 cm groove from above — and from below the openings for double-glazed windows.

The frame was treated with antiseptic.

I chose white paint for the frame. The paint is mixed with the solvent as it will be sprayed. To protect the respiratory tract, you must wear a respirator: the smell of the paint is quite strong.

Before painting, I measured the moisture content of the wood. A figure of about 15% is normal for painting.

The frame is painted with the first layer at -10 ° C. On the second day, a second coat of paint is applied.

We make a roof and insert windows
Polycarbonate will be laid on the roof of the greenhouse. According to the reviews I’ve read, it’s kind of one of the best on the market. 12-meter sheets of polycarbonate bought before the price increase. I laid out the sheet in the yard — and made a marking.
Here is a set of cutting tools for cutting a sheet of polycarbonate. In principle, it can be cut with a stationery knife, a floor covering knife. But as for me, the thickness of the sheet is quite large, and it is better to cut it with a grinder with the thinnest disk (1.6 mm).

When installing the roof, polycarbonate honeycombs can get clogged with snow, so they need to be sealed. The end is sealed with tape, then the end plastic profile will be installed.
Now install the ridge profile, which will connect two sheets of polycarbonate.

The profile is fixed by bolts. The roof of the greenhouse is ready — you can throw it on the frame.

Before installing the roof, it is necessary to lay a heat insulator between the polycarbonate and the wood.

We make a gasket — and we will already lay polycarbonate on it.

The roof sheets are laid, later I will put a metal skate. Thermal washers will be used to attach the polycarbonate to the frame.
The washer consists of a foam polyethylene gasket, a plastic lining, and a plastic plug. After the construction of the house, there were many such washers and screws.

First, we make a hole in the polycarbonate. The drill must be sharp so that the plastic does not crack.

We collect the washer on the screw and tighten the screw. It turns out neatly and without cracks.

The head of the self-tapping screw is closed with a plug.

Here came the double-glazed windows and the door. Double-glazed windows are single-chamber.
To transport double-glazed windows, I will use two glass jacks. pre-screwed rectangles of plywood, they will hold the double-glazed window so that it does not fall.

With the help of glass jacks, we put a double-glazed window in the opening and fix it.

Now we foam the cracks between the frame and the double-glazed window with polyurethane glue.
All double-glazed windows are installed, the cracks are foamed.

A single-component acrylic sealant will be used to seal the joints. It is vapor-permeable, and you can work with it at temperatures up to-25 ° C. I fill the gun with sealant, and then I will rub the sealant with a spatula.

Beads cut out of plywood. I attach them to the screws, and then paint them in the color of the frame.

The greenhouse is glazed.

The next stage of work will be the installation of heating and ventilation.
Related posts:
 Glass Greenhouse with Their Hands
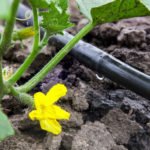 How to Arrange an Effective Drip Irrigation in the Greenhouse
 Warming of the Greenhouse Base With Foam: Technology and Advantages
 Insulated Flue – Saving Home from Fire
 Convenient and Useful Nozzle On the Trimmer With Your Own Hands
 Protect Your Garden, or How to Make a Scarecrow
 Outfit for Your Windows: Hinged and Roller Shutters, Mosquito Nets and Awnings
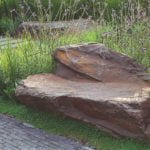 In Your Garden Begins the Age of Stone: Choose Decorative Benches
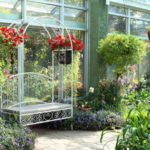 How to Build a Winter Garden in the Country
 How to Make a Washstand for Country House the Hands
 And Above us is Not Dripping: Shelter for the Garden
 Pros and Cons of Various Types of Solid Fuel for Boilers: Wood and its Derivatives
 Pros and Cons of Various Types of Solid Fuel for Boilers: Coal and Peat
 Choose Radiators for the Summer Cottage
 Additional roofing elements (accessories)
 Terraced motives the device is weatherproof wooden floors