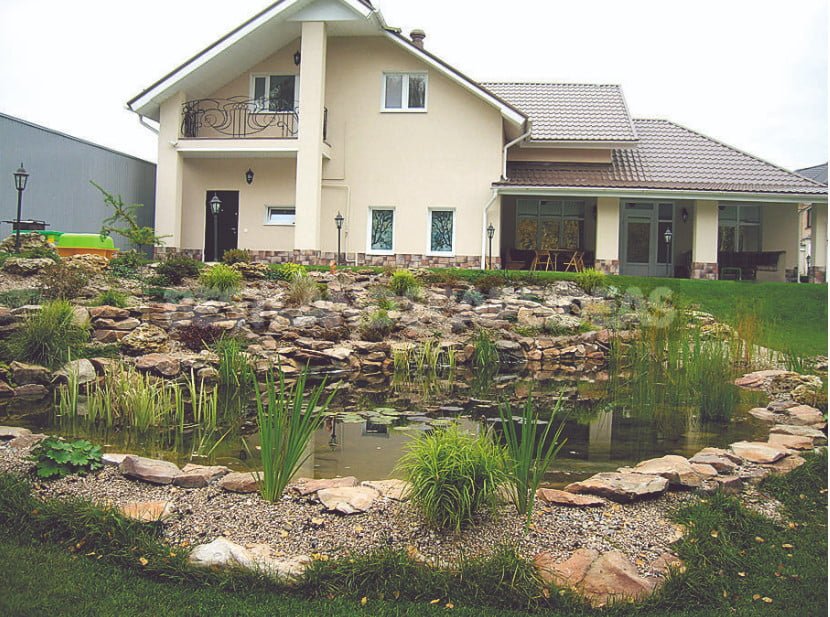
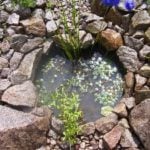
Landscape pond – pond, organized on a natural model-among all possible water devices is the most popular. This is understandable: stylistically, it fits into any garden, the work is done easily and quickly, the pond looks absolutely natural and exists autonomously, self-cleaning, that is, without requiring burdensome complex care.
I want to warn you that my author’s way of creating such a pond is not the only one. Some specialists working in this direction offer their technologies — for example, the cultivation of aquatic plants in containers, the content of exotic fish species that require warm wintering conditions, and to maintain the purity of water — the use of a large number of filtering equipment — multistage and, accordingly, expensive. I propose to build a garden pond in nature to minimize, firstly, energy and time costs for complex care and, secondly, which is important for many, to minimize costs. I’m sure that’s quite a strong argument.
Place under the sun
So, let’s start. It is advisable to work on the device of the reservoir to start in the spring or early summer, when the melt water will come to the desired depth. Depending on the characteristics of the site and weather conditions, as a rule, this time is from mid-may to mid-June.
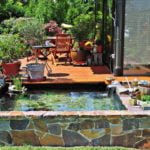
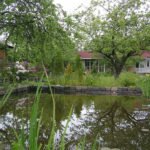
Having agreed that we build a garden pond “as in nature”, first of all we will choose the most suitable place. The pond should naturally fit into the surrounding landscape and be located so that it is convenient for you to watch it. To do this, usually next to him arranged outdoor area, where you can optionally install garden furniture, sun loungers or a wide stylish umbrella, under the shadow of which will fit the whole family on a Sunday lunch.
")
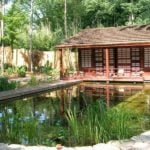
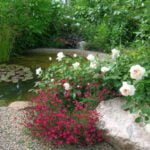
It is not necessary to have a pond in the lowland, as streams of melt and rain water will clog it. In addition, in the low place is always cold air, heaps of malicious swarming midges. It is not necessary to arrange a pond in the open, it can fit into the structure of the shady garden, making a special subtle note in the collection of ferns and rhododendrons. But if you want to enjoy the flowering water lilies, have to choose a place for it, illuminated by the sun at least 6-7 hours a day.
Therefore, the place of your pond under the sun depends on what decorative effect you ultimately want to get.
Size and shape
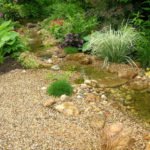
Choosing a place, of course, you need to determine the size and configuration. The dimensions can be very different, but the larger the pond, the faster it will establish a biological balance, which means that the water will be clean and healthy without additional effort on your part.
")
The question of depth worries many. It is solved in the same way as everything else: by the method of logical reasoning. If the pond is necessary only for decorative purposes, enough depth of 1 m. When planting water lilies to the bottom, their roots will be located at a depth of 60-80 cm If the pond is intended to keep the fish — depth of such a pond should be 1.5-2 m the respective sizes of the water mirror. Can not be called luxury addiction some (me included) to float fishing. Therefore, if the scale of your garden allows, why not treat yourself to your own pond for this purpose?
From experience I can say that all owners of garden ponds over time dream to expand your pond, so if the size of the allotted area and your financial resources allow, it is better to take this into account.
Marking on the ground
The easiest way to “draw” the line of the future pond with a flexible water hose. But it so happens that in parallel with the work on the creation of the pond on the site carried out General soil and planning work, installation of lighting equipment and irrigation system — that is, the final level of the soil horizon is not defined. In this case, for marking it is necessary to use wooden pegs or metal studs on which the rope is fixed.
")
When the configuration of the future pond is drawn, it is necessary to clear the area from plants that may have fallen into this zone, remove the turf, if any, and check the overall slope of the earth. If there is a noticeable bias in the periphery, at this stage you need to align the entire site. Subsequently, this figure can be slightly adjusted, but it is more difficult to correct serious distortions when all the work is almost completed.
Pit-depth and shape
It is more convenient to dig from the edges to the center, gradually deepening, and form a shallow water zone, checking with the project. Don’t forget to leave the planned terraces. In them you will plant the plants, which required immersion depth of 5 to 30 cm of the Terraces should be horizontal and wide – not less than 30-40 cm For the normal life of the reservoir is sufficient to arrange two or three levels of terraces, at a depth of 10, 20 and 40 cm, if the three of them, or 20 and 40 cm, if the two. In any case, the coast is better to do flat, stepped, with smooth transitions — so it is easier to decorate the coastal zone.
")
Working with the soil, it is desirable to use a wheelbarrow, and not to put the excavated soil here in a huge pile, which also have to disassemble. With a wheelbarrow you are not constrained in time, as a huge pile of land will not spoil the lawn or flower garden nearby, and the soil removed is likely to be heterogeneous at different depths and can be mobile and logically used here on the site. Part of the dense clay soil can be folded in the immediate vicinity of the pit to apply it later for decorating and planting aquatic plants.
When working with soil often come across construction debris, sharp fragments of natural stone, chopped tree roots and even the entire foundations of the former buildings. All hard and especially sharp objects should be carefully selected, so that in the future they do not cause damage to the film.
Film-size and laying rules
After the pit is ready, it is necessary to stamp the bottom and walls, check the level and, if necessary, correct the shore. They should be on the same plane, so that in the finished form no part of the shore was not above the water mirror. At the subsequent decorating it is necessary to achieve that the film was completely hidden by sand, soil, gravel, landings. This condition is important not only from an aesthetic point of view: if the film is openly sticking to the surface and exposed to the damaging effects of ultraviolet radiation and temperature changes, its strength in this place is reduced.
")
Then you need a flexible tape measure or a strong cord to measure the length and width of the prepared pit in the longest places and add on each side of 20-30 cm, depending on the chosen method of decorating the coastline. The resulting value is better to bring to an even measure, knowing the possible parameters of the length and width of the film rolls, so that there are no problems with the purchase. For example, 4×4 m, 5×6 m, 12×8 m and so on. It is possible to correct parameters, having tightened under an equal measure if to increase or reduce depth, length or width of a ditch a little.
The finished pit should be filled with fine, if necessary, sifted sand layer 3-7 cm, depending on the thickness of the insulating coating (the thinner the film, the thicker the buffer layer of sand). In order that sand well kept on sloping surfaces, it should be moistened a little. If the ground is strongly clogged with small stone or there is a possibility of damage to the film by the roots of closely spaced trees — in addition to lay the bed with a soft underlying protective material. Replace it can make-shifts-thick lutrasil, spunbond or any other soft material.
Before use, you need to pre-spread the film on a flat surface, it is better on a Sunny warm day, give it a couple of hours to lie down and straighten – it will become soft and plastic. After that, if the size of the film is relatively small, it should be rolled in the form of a pie evenly from all sides to the center — so it will be easier to distribute it in the pit. If the pond is large, and you use heavier rubber, it is more expedient to roll out the rolled film in a long roll on the smaller side and, placing this roll in one of the ends, carefully gradually roll it out.
")
Trying not to pull, distribute the film in the pit. That it does not move during operation, especially if the wind rose, press it in some places with a brick or stone. Creases gently straighten, form folds, trying to evenly distribute them around the perimeter. Sometimes it is advisable to lay a few deep folds, sometimes it is necessary to leave a lot of small assemblies-it all depends on the specific situation.
The smaller the pond and the more complex the configuration of the bed, the harder it will be to lay the film. Imagine for comparison, what is easier: to lay a sheet of paper, the bottom of a Cup or soup plate? The main condition: the film should lie freely, in any case, do not pull it. At this stage, it is desirable to have one or two assistants (depending on the size of the pond), as insulating materials for water bodies are very heavy, and they need to be laid as carefully as possible. When the pond will be filled with water, the film will SAG, smoothly rounding all the curves of the pit.
Continue reading in Step-by-Step Technology of Landscape Pond Arrangement on the Site (Part 2).
Related posts:
 Spring Inspiration
 Water Reservoir at Home With their Own Hands
 Ponds in the Country-a Pond or a Pool?
 Ideas for Highlighting the Suburban Area
 The Most Beautiful Sculptures for the Garden
 Body of Water: Drainage of Excess Water
 The Island, as a Decoration of Your Pond
 Pond in the Garden: Choose Materials and Equipment (Part 1)
Pond in the Garden: Choose Materials and Equipment (Part 2)
Pond in the Garden: Choose Materials and Equipment (Part 1)
Pond in the Garden: Choose Materials and Equipment (Part 2)
 Pools For a Summer House
 Step-by-Step Technology of Landscape Pond Arrangement on the Site (Part 2)
 Step-by-Step Technology of Arrangement of the Stream On a Country Site (Part 1)
Step-by-Step Technology of Arrangement of the Stream On a Country Site (Part 2)
Step-by-Step Technology of Arrangement of the Stream On a Country Site (Part 1)
Step-by-Step Technology of Arrangement of the Stream On a Country Site (Part 2)
 Making Garden Pond Plants (Part 1)
Making Garden Pond Plants (Part 2)
Making Garden Pond Plants (Part 1)
Making Garden Pond Plants (Part 2)
 Dry Creek is a Stylish Garden Decoration