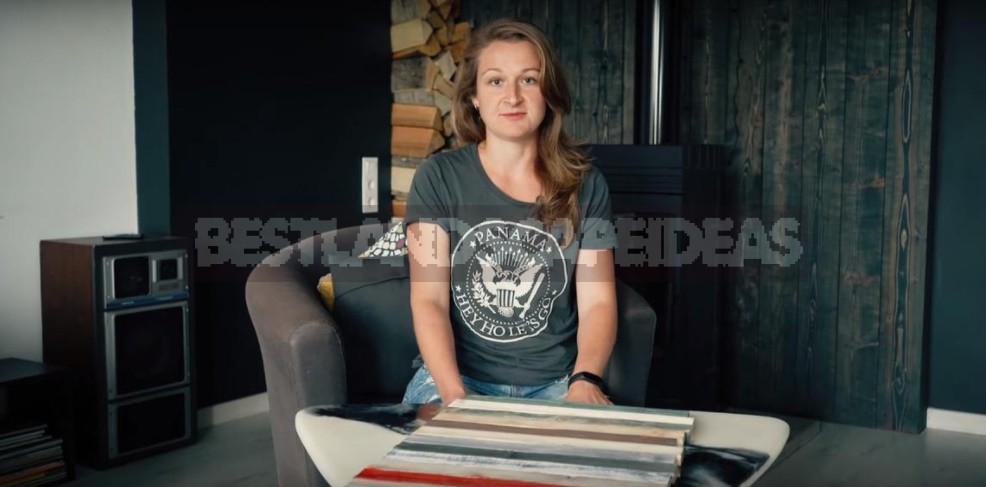
The main methods of wood processing have long been known to everyone. Oils, lacquers, paints. I will tell you about non-standard solutions. They do not require exotic compositions, as we will achieve the desired effect by combining the materials we are familiar with.
In fact, all the options I have proposed can be called aging of wood, since they are based on brushing. Well, in addition, we will use acrylic and chalk paints, oils and various waxes. This treatment is suitable for decorating furniture or interior decoration. In total, I prepared 12 samples — hence, 12 decoration options. All of them are simple in execution, but at the same time they look very impressive.

For the blanks, I used pine-a material that is accessible and interesting from a decorative point of view: the active pattern of the wood is ideal for aging. Let’s start with brushing. Using a polymer-abrasive brush, we remove the soft fibers, keeping the hard ones. For aging, you can also use a metal brush, but the result will be slightly different, since it works less delicately, and after processing, noticeable scratches remain on the hard fibers.

Important! In the process of brushing, a lot of fine dust is formed, so it is necessary to reliably protect the eyes and respiratory organs.
Now that the mechanical aging has been performed, we will proceed to processing with various compositions.
1. Tinted oil
Use teak oil on a tinted black color. Apply it with a piece of cloth. Then wait for about a minute — and wipe with a clean rag. Already at this stage, we get a contrasting wood pattern. But we will not stop. Apply a dark green wax to the surface. The result is a deep green hue. This method of finishing wood looks good in the interior. For example, I have a wall in the living room decorated in a similar way. Under different lighting conditions, different shades appear.
2. White oak oil
We will treat the billet with oil of the color “white oak”. Also, using a rag, apply the composition on the surface and wait until completely dry. Next, the surfaces need to be sanded, revealing the natural color of the protruding fibers. After that, we will impregnate the workpiece with wax-based oil. This is necessary not only to protect the wood, but also to increase the contrast of the picture.
3. Rub with wax
In this case, the task is to preserve the natural color of the protruding fibers. To do this, rub them with wax. We treat the entire surface with dark green Shabby paint and wait until it dries completely. Using sandpaper, we release the upper fibers from the wax. The result is a natural wood pattern on a tinted background. We cover it with varnish, protecting and emphasizing the contrast.
4. Wax + paint
This method is very similar to the third option, but the paint will choose a light olive color — and before applying it, we will not process the fibers with wax. After the paint dries, we will go through the blank with sandpaper, free the protruding fibers from the color. As a result, they will be less contrasting. Next, we treat the surfaces with oil of the color of larch wood. It has a reddish hue, which in combination with the paint will give an interesting effect.
5 and 6. Putty + oil
On the brushed billet, we apply putty on the white wood. We wait until it dries, and treat the surface with wax-based furniture oil. The fifth option — dark oil, the sixth — colorless. Again, we will wait for the blank to dry, and we will sand it. Thus, we will open the drawing, but at the same time we will keep the surface flat.
7 and 8. Firing + wax
First, we will treat the surface with a burner. We apply white or dark wax to the burnt billet. We get deep and interesting colors.

9. Acrylic paint
We will need ordinary acrylic paint. Apply the main color, such as black, to the workpiece with a brush. We paint along the fibers. When the coating dries, take a contrasting color and use a flat, stiff brush to apply it with light touches in chaotic movements, but now-across the fibers. The brush should be almost dry.
10. Use chalk paint
We apply red paint to the workpiece. Dry it. Now we cover with wax the places that we want to leave open. We apply a white paint Shabby based on chalk. Without waiting for complete drying, use a spatula to scrape the paint off the waxed surface. As a result, the effect is not just an aged tree, but the history of a certain interior, which has changed over time.
11 and 12. Remove the paint with a spatula
Again, take the acrylic paint and apply it with a brush. Dry the blanks. Then cover one with light olive paint and immediately use a spatula to remove all the excess. We get a slightly noticeable gradation of the drawing. The second blank is covered with red paint and again remove the excess with a spatula. Here, the tree pattern is more noticeable, but unobtrusive.
Related posts:
 Glass Greenhouse with Their Hands
 Insulated Flue – Saving Home from Fire
 Convenient and Useful Nozzle On the Trimmer With Your Own Hands
 Protect Your Garden, or How to Make a Scarecrow
 Outfit for Your Windows: Hinged and Roller Shutters, Mosquito Nets and Awnings
 In Your Garden Begins the Age of Stone: Choose Decorative Benches
 How to Build a Winter Garden in the Country
 How to Make a Washstand for Country House the Hands
 And Above us is Not Dripping: Shelter for the Garden
 Pros and Cons of Various Types of Solid Fuel for Boilers: Wood and its Derivatives
 Pros and Cons of Various Types of Solid Fuel for Boilers: Coal and Peat
 Choose Radiators for the Summer Cottage
 Additional roofing elements (accessories)
 Terraced motives the device is weatherproof wooden floors
 How to Heat the Boiler with Wood
 Always on Guard: Security Systems for Country Houses