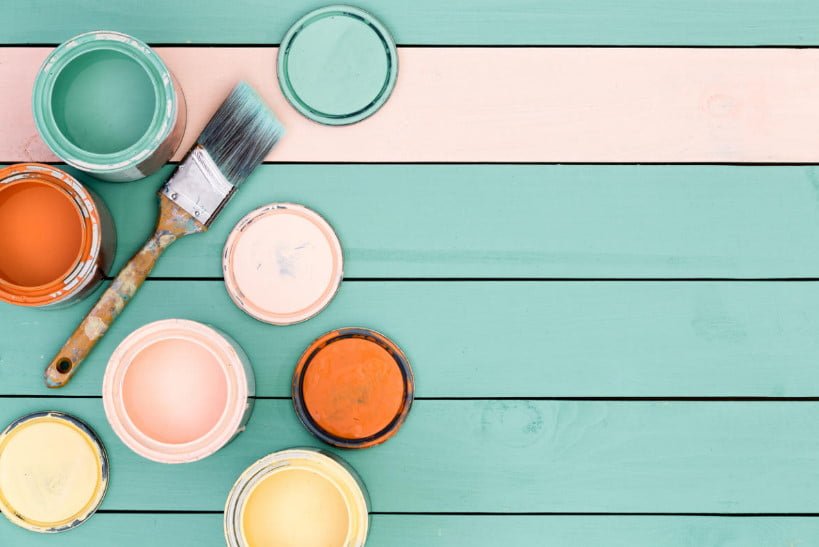
You can dream of a designer piece of furniture, looking at images of stylish interiors, and you can try to make it yourself, realizing your own idea. Alteration and updating of furniture-a useful and exciting experience. You get a double benefit: an exclusive thing and enjoy the process of creativity.
Have you decided to update your old furniture or create a unique masterpiece with the help of painting? Half, if not more, the success of the enterprise – in a thorough preliminary preparation for creativity.
“Haste is bad because it takes a lot of time …”
The words of the English writer and journalist Gilbert Keith Chesterton in the title could be the motto of anyone who planned to do anything. Because so often, starting the project, we are in a hurry to see the fruits of their labor, missing the details and hoping that the flaws caused by the rush, will not be noticed.

You have thought through the details of the appearance of a repainted Cabinet or bedside tables, chose and bought paint and are already looking forward to how the updated furniture will decorate the interior of the living room? How could you not anxious to begin, do not rush to open the jar of paint.
Do you have a plan?
Develop an action plan. If you understand from the very beginning what to do and why, and in what sequence, it will definitely have a positive impact on the end result, including your mood.

So, you have already come up with a new decor for old furniture. Now inspect carefully “patient”: perhaps before decorating it will require a thorough”treatment”. According to the results of the inspection, make a list of necessary purchases.
Check if you have everything in stock
Before starting the creative process, check the list, whether you have stocked up with everything necessary in the work.

In addition, in fact, paint, varnish or other finishing decorative coating, you will definitely need a lot of tools, materials and devices. Their choice depends on what and how you plan to do, in what state the updated item. About what will be required in addition to paint, too, will talk separately.
Spend time and money to buy everything you need — it will save your nerves, effort, and ultimately money too: the film to hide from splashes of paint is much cheaper than a new carpet or plywood Wallpaper.
Remove all that interferes
To qualitatively paint any subject, it is necessary to remove as much as possible everything that is not subject to coloring, so, interferes. Of course, all the furniture to dismantle, not worth it — and suddenly will not be able to collect back? But to remove the doors, remove the drawers and shelves, remove the glass and Unscrew the handles and hinges is a must.

What prevents, but is not easily removed, carefully paste over with masking tape. If the item is curved and convex, glue in several layers, using small pieces of tape, as when working with papier-mache. For a more complete cover and minimal joint, stick the strip with a small margin, then to trim the excess.
Sanding and priming the surface
Freed from excess object must be cleaned of dirt and treated with sandpaper. This step is necessary to align, remove the old coating, rust (if the object is metal) and create a rough surface if the furniture is plastic or lacquered.
The degree of removal of the old coating and leveling the surface depends on your decorative ideas and the condition of the furniture. So, for example, if you have conceived in the end to get a brushed surface, then to achieve a perfect glossy polishing, of course, is not worth it. There is no need to tear off the entire layer of lacquer with lacquered furniture, if it holds well, and the task is only to change the color — just remove the gloss.

Grind (clean) the surface better in two stages. First remove the old coating. This will show all the places that require repair, which were hidden under the paint. At this stage, you need to repair the furniture, if it needs it: to close up the chips and cracks, replace the lost parts, restore the strength of the structure.
Repair of furniture-a separate issue … Here I want to say only that, if possible, you should try to use the same methods of Assembly, which were used in the creation. So, if the jumper at a chair or stool is cut into legs, it is better to try to restore fastening, instead of to use nails or screws.

After repair the surface of the object must be treated again with sandpaper: remove excess putty and glue stains than finally achieve the necessary evenness.
After that, you need to carefully remove the dust: sweep with a dry brush, vacuum and even wipe with a damp cloth. Dust is the worst enemy of the paint coating process. Therefore, do not paint the furniture on the street, if you do not want to stick to fresh paint dandelion fuzz, wool, bugs and other artifacts.

Now you can move on to the application of soil. The primer improves the adhesion of the paint layer to the surface of the material, which is important when painting objects from materials with poor absorbency, respectively, reduce the consumption of paint. After the soil dries, once again further treat the surface with fine sandpaper, carefully remove the dust and start, finally, paint and decorate.
Returning to the above quote, slowly and without forgetting about the important details of the process, you will save a lot of time. At the same time make a beautiful thing, and do not waste time, effort and money in vain, getting a mediocre result, very far from your dreams and plans.
Related posts:
 5 Best Gazebo for Country House. Types and Features
 Hobbiton – Features, How to Find, Photos, Design Ideas
 8 Best Design Ideas to Improve Your Country House. Scottish Style
 Home decor beached style
 Grills and a Barbecue for Villas with Their Hands
 How to Make a Well in a Country House or Cottage?
 Types of Barbecues and Mangals
 Grill and BBQ: Where to Put How to Cook?
 How to Create Your Own Theater of Light and Shadows
 Insulated Flue – Saving Home from Fire
 Choice of Wood for Building a Wooden House
 Drainage Systems In the Suburban Area
 How to Choose a Place for the Construction of the Bath
 Tiles for the Garden With Their Hands
 Outfit for Your Windows: Hinged and Roller Shutters, Mosquito Nets and Awnings
 Drainage Systems in the Suburban Area Surface Drainage