Not so long ago, it was believed that the amenities in the courtyard of the dacha are a normal phenomenon. But today I want to live in comfortable conditions not only in my apartment, but also in a country house. That’s why we decided to build a frame extension, and equip a shower and toilet there.
The water on our site is only from the summer water supply, so the time of our stay at the dacha lasts from May until the first frosts in October. In spring and autumn, we use electric convectors to create a comfortable temperature.
We did not plan to build a heating system, build a stove, and arrange a water intake source, as well as use the dacha for year-round living. Under the circumstances, the idea of adding a bathroom seemed to us quite good. And for the organization of draining of drains, we purchased a sewage station.
Construction of the extension
Plumbing equipment was placed along the entire extension parallel to the wall of the house adjacent to it. Part of the wall extends beyond the main building, a small window was installed in it at a height of about two meters, which we use to ventilate the shower. In sunny weather, the light coming from the window is quite enough.
The dimensions of the premises were planned so that it was comfortable to use them. The entrance to the shower room is from the annex, and to the toilet room-from the vestibule (Fig. 1). So that the entrance door does not block the vestibule, they made it extendable. This solution made it possible to increase the area of the shower by reducing the distance between it and the toilet, and make this opening smaller than the width of the door.

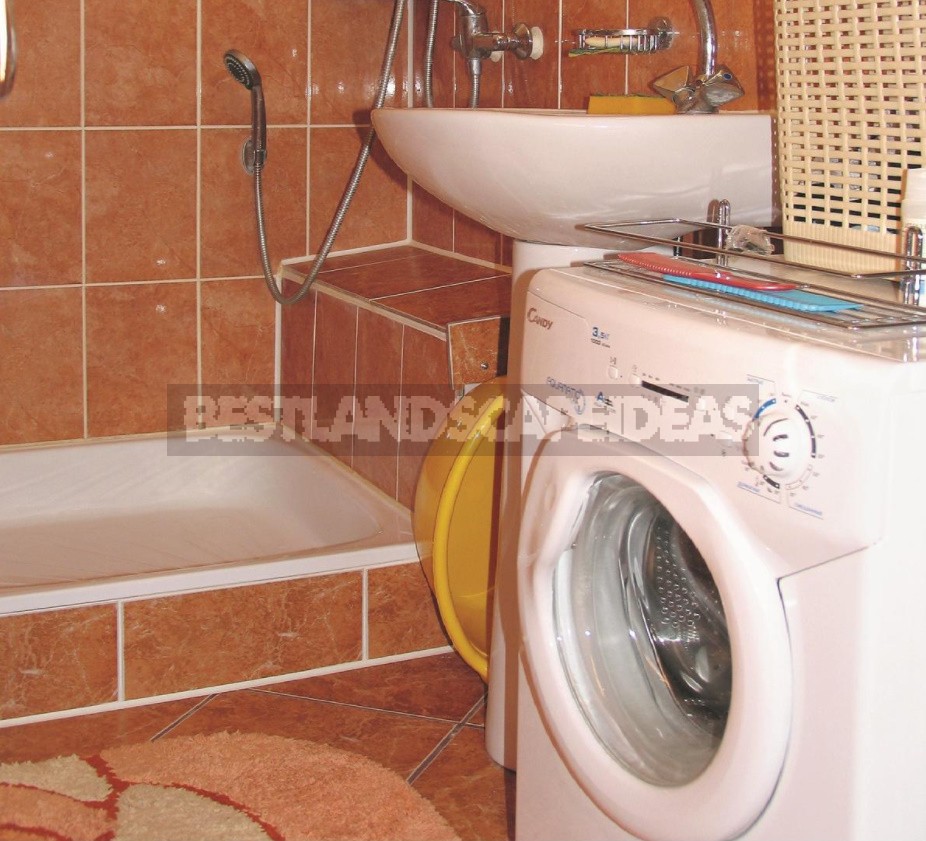
The extension was built using frame technology, and the walls of the sanitary facilities were similarly executed (photo 1). At the same time, the thickness of the insulation of the internal walls is 5 cm, and the external ones facing the street are 10 cm. Stone wool was used as a heat insulator, which also serves as sound insulation in the construction of internal walls (photo 2).
From the inside, the walls were sheathed with clapboard and covered with transparent azure. The floor of the extension was also insulated with cotton wool, but already in three layers. As a rough floor, an unstressed board “fifty” was used. The surface was treated several times with an antiseptic, well dried and painted. The coating turned out to be rough, but taking into account the subsequent laying of tiles, this turned out to be a plus.
Interior decoration
The walls of the sanitary facilities were also tiled. It was already necessary to put it on drywall, so this work did not require much effort and time. But with the installation of tiles on the floor, I had to tinker.

We did not dare to lay it immediately on the boards, although they were prepared in advance. To strengthen the adhesion of the glue to the base, nails were stuffed into the boards and a wire was stretched between them. Nails with wide caps were not hammered to the end, so that the nail head protruded above the surface of the board by about half the thickness of the tile glue substrate (photo 3). It turned out to be a “reinforced base”.
In the toilet, the tile was put in the classic direct way. The width of the toilet room (100 cm) was calculated in advance for finishing with tiles, so it did not have to be cut: three tiles of 33 cm each, plus seams and gaps near the wall (photo 4).
In the shower, the floor was lined diagonally (photo 5). This work required not only special care, but also the presence of a good tile cutter.

Installation of a shower tray
The enameled steel shower tray has always caused us distrust. For some reason, it seemed that he would bend under his feet. Therefore, the frame was built for it from the same”fifty”. The upper part of the base was filed with an electric pipe, so that the sides of the plumbing could sit securely on it. The boards were then painted again.
A sheet of hard insulation was placed under the pallet. Screws were screwed into the base boards and a wire in the form of a grid was fixed on them for reinforcement (photo 6). An adhesive compound was laid out on top of the wire, and it was covered with polyethylene.
The next day, the plastic film was removed, the wooden base and the glue that had seized were smeared with sealant, and then the equipment was installed (photo 7). But before the final installation, they did not forget to make a grounding.

Overload protection
Since the load on the electrical network has increased, there was a fear that with the boiler, electric convector and washing machine turned on, the protection will no longer withstand. We realized that it was impossible to keep the boiler constantly on, so we made only one outlet in the shower. Of course, it will not be possible to wash and heat the water at the same time now, but there will be no overload.
Related posts:
 Glass Greenhouse with Their Hands
 Insulated Flue – Saving Home from Fire
 Convenient and Useful Nozzle On the Trimmer With Your Own Hands
 Protect Your Garden, or How to Make a Scarecrow
 Outfit for Your Windows: Hinged and Roller Shutters, Mosquito Nets and Awnings
 In Your Garden Begins the Age of Stone: Choose Decorative Benches
 How to Build a Winter Garden in the Country
 How to Make a Washstand for Country House the Hands
 And Above us is Not Dripping: Shelter for the Garden
 Pros and Cons of Various Types of Solid Fuel for Boilers: Wood and its Derivatives
 Pros and Cons of Various Types of Solid Fuel for Boilers: Coal and Peat
 Choose Radiators for the Summer Cottage
 Additional roofing elements (accessories)
 Terraced motives the device is weatherproof wooden floors
 How to Heat the Boiler with Wood
 Always on Guard: Security Systems for Country Houses