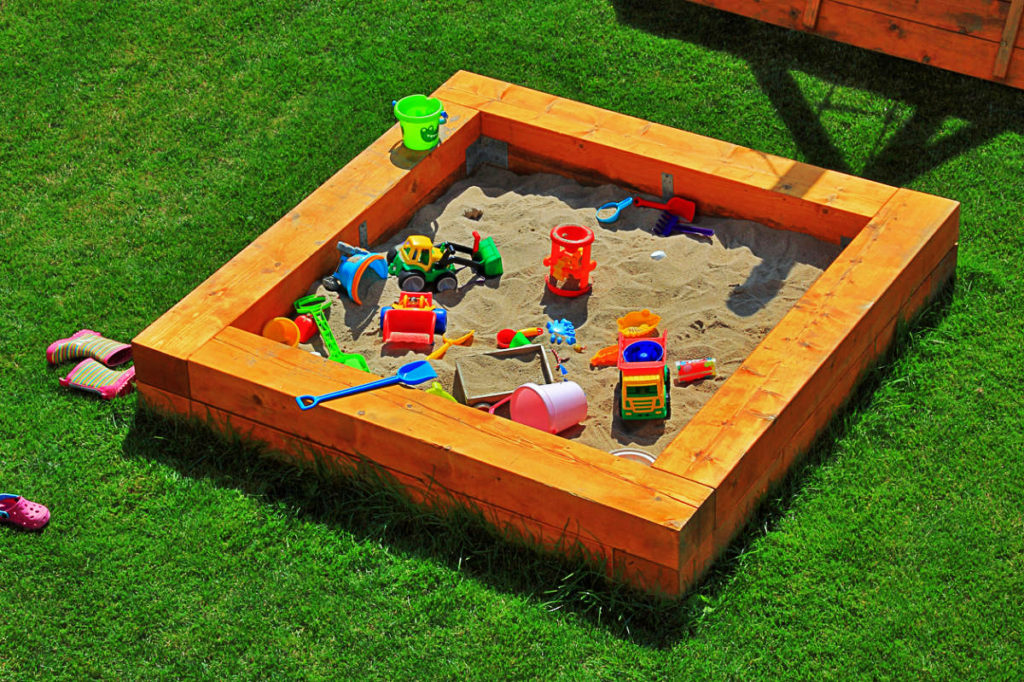
In this article we will talk about the construction of a children’s sandbox with their own hands .
The location of the sandbox
Never hide the sandbox behind tall bushes or trees. Children should always be in your sight, so place it so that you can see your children playing in the sand. Try to choose a place that half of the sandbox was in the sun, and half in the shade.

To do this, you can equip it not far from the sprawling tree, however, then you will have to regularly clean the area from leaves and twigs. If there are no suitable places with a shadow, you can install an umbrella in the sandbox.
Preparation of basis of the sandbox
The size and shape of the sandbox can be arbitrary, but the standard facilities for children 2-5 years of age usually make 1.7×1.7 m.That’s the size of the sandbox we will build.
Operating procedure:
- Arm yourself with pegs, marking tape, cord.
- Measure the area around the perimeter.
- Then remove the layer of earth in 30 cm, and in the center of the sandbox make a hole depth of 60-70 cm and a diameter of 40-50 cm.
- Fill it with gravel or pebbles, a little tamp — get a kind of drainage well.
- Make a slight slope from the sides of the sandbox to the center. Now after heavy rains your sandbox will not turn into a swamp and will dry quickly.
- As a result, we have a rectangular hole of 170×170×30 cm with a slope to the center.
The basis for the sandbox
The basis for the sandbox can be a dense polyethylene film, geotextile and even a regular sheet of plywood with pre – made holes (for drainage).

You can not make the base, but then over time the sand will mix with the ground, and your kids will be uncomfortable to play. In addition, the base will block the path of rodents and insects. One caveat: the base should be laid on a pre-sprinkled sand “pillow” height of 5-6 cm.
The sides of the sandbox
Prepare 4 block of size 95×5×5 cm, 4 boards size of 150×30×2.5 cm and 4 boards for the sides of the seats (they are placed on top, around the perimeter of the sandbox), thoroughly Polish them. To do this, you can use a conventional grinding nozzle on an electric drill or grinder. Then 2-3 times process the boards and timber drying oil(instead of drying oil, you can use any antiseptic that protects the wood from rotting).

Bury the sticks in the corners of the sandbox, buried them up to 15-20 cm, then nail them to boards. If you don’t have wide boards, you can make boards from narrow, for example, to take 3 boards with a width of 10 cm on each sidewall of the sandbox.
Then, along the perimeter of the sandbox, strengthen the horizontal lining-seats, where they can sit down to rest.
Sandbox cover
Cover for the sandbox-not mandatory, but a very desirable attribute . It will protect the sand from debris (dry leaves, twigs from standing next to bushes and trees, and so on).

As a roof it is possible to use an awning which should be pulled constantly on a sandbox. And it is possible to make a cover from boards that is much more convenient at frequent use.
Very convenient swing cover for the sandbox, made of two shields. The shields are held on by hinges, are supplied with handles. In the expanded form they turn into convenient benches with backs.

Decorating the sandbox
Paint the sandbox in bright colors. It is possible to put on walls and sides not only colorful pictures, but also various developing drawings: letters, figures, geometrical figures.

If you prefer the natural color of the wood, just treat the construction of drying oil.

Filling the sandbox
To fill the sandboxes usually used river sand (it is the cleanest) or quartz (you can buy in the store). Any sand before pouring into the sandbox must be sifted. For our sandbox you will need a lot of sand, at least 1 ton.

Here are a few photos with different design options sandbox


