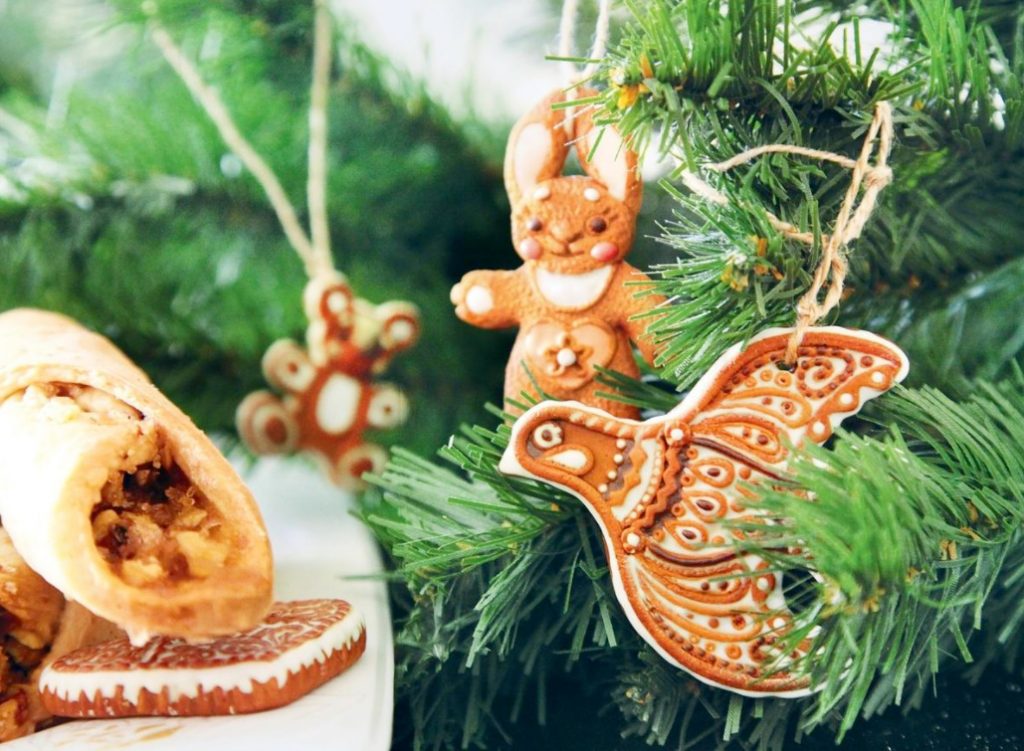
Marshak also wrote:”Gingerbread and flags do not grow on the Christmas tree.” Let it be so! But nothing prevents you from decorating your Christmas tree with gingerbread made of polymer clay. Yes, they can not be eaten in the morning, as they did in the old days with sweets, but they will please you for more than one year.
You will need
- Polymer clay No. 17 (ochre), 74 (terracotta), 0 (white)
- Fimo gel
- Pastel dry light brown in two shades-warm and cold
- Natural ground spices (cinnamon, cardamom, black pepper, etc.)
- Scalpel
- Shaped blades for plastic (large and small)
- Soft round brush No. 4 (for pastels)
- Synthetic brush No. 0 (for gel)
- Toothpicks
- Plastic roller
- Cosmetic sponge
- Thin glass (10×15 cm)
- Confectionery baking paper with silicone impregnation
- White paper (A4)
- Coarse abrasive sandpaper No. 150
- A simple pencil
- Thick marker
- Scissors
- Capacity for the glaze
- Household oven or a toaster oven (no microwave)
To prepare the “dough”, you need to mix polymer clay No. 17 and No. 74 in a ratio of 20:1 (add a very small piece of a warmer shade to the main color to achieve the color of the gingerbread dough). Then, for the realism of the simulation, we mix real spices into the plastic (for one pack of Fimo 56 g — 1/2 teaspoon). To prevent air bubbles from getting into the plastic, you first need to mix the spices with the gel (about 1:1), and then with it.
For the “glaze”, we combine the gel and plastic No. 0 in a ratio of 1:1. In advance, we put small pieces of polymer clay in the gel (you can rub it on a regular grater) and leave it for a couple of hours, then stir the “glaze” until the lumps disappear.
In the same way, we prepare a mixture for covering the seams from a piece of “dough” about the size of a pea (gel + plastic in the proportion of 1:1).
The order of the work
1. First, draw a sketch-pattern of the future gingerbread with a marker on paper.

2. Fill the space in the gingerbread with patterns. It is acceptable to make a very approximate drawing, and in the course of work you can always change something. It must be remembered that the thickness of the pattern line is 2 mm.

3. To make the base of the product, roll out a plate of “dough” with a thickness of 3-4 mm, put a pattern of gingerbread on it and roll it several times with a roller.

4. Remove the paper and cut out the figure along the contour with a scalpel.

5. Put the base on the baking paper and slightly press the sharp edge with your fingers (carefully, without deforming the figure), so that the future gingerbread looks natural.

6. Lightly press the sandpaper with the rough side to the surface of the plastic.

7. Put the pattern on the plastic and trace the inner lines of the drawing with a sharp pencil so that they are imprinted on the figure. On these lines, we will then lay out the drawing. If the lines are weakly visible, you can draw the pencil again on the plastic base itself.

8. Take a small piece from each pastel chalk and rub it into a fine powder. Pastels of a cold shade are taken four times more than warm ones. Then dip the brush in the powder and shake off the excess. Lightly touching the brush, we tint the base along the edge, on the back side and on top, leaving the center of the figure light.

9. If in the future the gingerbread will be used as a Christmas tree toy, then you need to make a hole with a toothpick in the place where the ribbon or ribbon will then be put on (the hole should be between the lines of the ornament). We burn the product for 10 minutes.

10. Cut a piece from the sponge and dip it in the gel so that there is no excess. Without smearing, apply the gel to the pastel-tinted surface in a very thin layer. We burn for 5 minutes (first we process the back side of the base, we burn, then we process the edge and top and burn again). The gel coating will make the pastel tinting brighter and protect it from external influences.

11. Now we make blanks for the ornament. We roll out the dough-colored plastic ropes with a thickness of 2-2. 5 mm-for the outer contour and large internal elements, with a thickness of 1.5 mm – for thin elements. To make them smooth, you can roll them out with glass on paper. To simulate the rough surface of the “dough”, the ropes can be rolled several times over the abrasive skin. We will make the ropes as long as possible, so that later when laying out the ornament there are fewer seams. We will also need elements in the form of balls with a diameter of 1.5 to 2.5 mm.

12. Some elements can be cut with a shaped blade.

13. With brush No. 0, apply the gel in a thin layer on the lines along which we will lay out the ornament, and put a thick rope and curly elements on top. We do this on the main contour outside and inside. From the edge of the base, leave an indent of about 1-1. 5 mm. We take the mixture on the tip of the toothpick (for seams) and carefully cover up all the gaps between the lines at the joints. On the ropes and other elements with the tip of a toothpick, you can make depressions to complement the decor. Excess gel is removed from the base with a napkin.

14. We lower the brush into the pastel powder and tint the laid-out contour on top. We burn the product for 5 minutes.

15. Apply the gel to the remaining lines of the drawing and lay out the entire ornament, not forgetting to cover the seams. To make the details fit well into the shape, we make their tips pointed, pulling them out with your fingers. We tint the surface with pastel. Bake for 5 minutes.

16. Using a sponge, apply a thin layer of gel to the entire ornament. We burn it for 5 minutes, then dip brush No. 0 in the “glaze” and apply it around the outer contour. Bake for 3 minutes.

17. Fill the space between the contours of the drawing with glaze, burn the product for 3 minutes.

18. Elements can be highlighted with a darker color. To do this, mix the pastel powder with the gel. Excess glaze is removed with a napkin. We burn the product for 30 minutes. The carrot is ready!

Useful tips
- To cut out the base of the gingerbread, you can use a shaped blade, plastic cutters or ordinary cookie cutters.
- If the polymer clay is too soft and sticks to your hands, you can lubricate or mix a little starch in it.
- If you want a brighter shine, additionally cover the gingerbread on top with a glossy plastic varnish.
- Before firing, the glaze can be sprinkled with spices or decorative sequins.
- Firing is performed at a temperature of 110°C. The product is placed in a preheated oven, after each firing cycle, it must completely cool down before you start working again.
- When firing, you can not put the product on metal, you must use baking paper and a heat-resistant surface (ceramic or glass).
- You can make chocolate-colored gingerbread cookies. You can also make the glaze not white, but multicolored. To do this, you need to mix small pieces of colored plastic to the finished glaze (to get pastel colors of parts for 10 parts of the glaze, 1 part of plastic + 1 part of pure gel is taken).
- The work surface is covered with ordinary white paper, which can be attached with tape for convenience.
Related posts:
 Ideas for New Year Bouquets and Arrangements for a Pleasant Festive Interior
 Christmas Toys and Various Pendants With Their Own Hands
 Candlesticks With Their Hands: Ideas and Instructions
 Christmas Gifts With Their Hands: Potholders — Beauty For An Hour
 Christmas Crafts From An Old Alarm Clock: Master Class
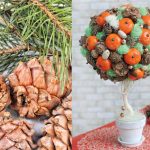 Christmas Topiary With Pine Cones And Tangerines: a Master Class
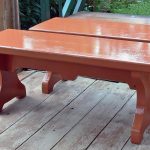 Two Benches For The Porch: Step-By-Step Master Class
 Rugs From Old Things: Cozy Ideas For Beginners And Experienced Craftswomen
 Decorative Pillows With Your Own Hands: Different Techniques, Photos
 Christmas Crafts Made Of Denim With Your Own Hands
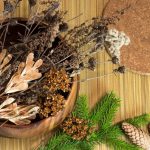 Paintings Made Of Natural Materials – It’s Cool!
 Florarium Made Of Plastic Tubes, Or Stylish Decor For a Penny
 Grills and a Barbecue for Villas with Their Hands
 Glass Greenhouse with Their Hands
 Common Mistakes in Preparing the Garden for Winter. Covering the Plants.